- BBC Food - Recipes - Pane Toscana: by Katie and Giancarlo Caldesi.
- Tuscan Bread (Pane Toscano) Recipe | King Arthur Flour:
- Traditional Italian No-Knead Sourdough Bread - Bread and Companatico:
'via Blog this'

Read the book and then get cooking. Food. Recipe.
Showing posts with label bread. Show all posts
Showing posts with label bread. Show all posts
Monday, 28 August 2017


Monday, 26 December 2016
My Bread. Speedy No-Knead Bread.


3 cups bread flour (408 grams)
1 packet (7 grams) instant yeast
1 1/2 teaspoons salt
50g Butter or Marg
1. Combine flour, yeast, butter and salt in a large bowl, with fingers to resemble fine breadcrumbs.
Add 1 1/2 cups Warm water and stir until blended; dough will be sticky.
Cover bowl with plastic wrap.
Let dough rest about 4 hours at warm room temperature, about 21C.
2. Lightly flour a work surface and place dough on it; fold left side to the middle the right side over that (you have 3 layers) turn 90deg and repeat,turn 90deg and repeat again.
Place dough in the floured washed out bowl Cover loosely with plastic wrap and let rest in a warm place 30 minutes more.
3. While the dough is proving for 30min, heat oven to 230C.
Put a 6-to-8-Liters heavy covered pot (22cm cast iron, enamel, Pyrex or ceramic with lid) in oven as it heats.
When dough is ready, carefully remove pot from oven.
Slide your hand under dough and put it into pot, seam side up.
Shake pan once or twice if dough is unevenly distributed; it will straighten out as it bakes.
4. Cover with lid and bake 30 minutes, then remove lid and bake another 20 minutes, until loaf is beautifully browned.
Cool on a rack.
Yield: 1 big loaf.
1 packet (7 grams) instant yeast
1 1/2 teaspoons salt
50g Butter or Marg
1. Combine flour, yeast, butter and salt in a large bowl, with fingers to resemble fine breadcrumbs.
Add 1 1/2 cups Warm water and stir until blended; dough will be sticky.
Cover bowl with plastic wrap.
Let dough rest about 4 hours at warm room temperature, about 21C.
2. Lightly flour a work surface and place dough on it; fold left side to the middle the right side over that (you have 3 layers) turn 90deg and repeat,turn 90deg and repeat again.
Place dough in the floured washed out bowl Cover loosely with plastic wrap and let rest in a warm place 30 minutes more.
3. While the dough is proving for 30min, heat oven to 230C.
Put a 6-to-8-Liters heavy covered pot (22cm cast iron, enamel, Pyrex or ceramic with lid) in oven as it heats.
When dough is ready, carefully remove pot from oven.
Slide your hand under dough and put it into pot, seam side up.
Shake pan once or twice if dough is unevenly distributed; it will straighten out as it bakes.
4. Cover with lid and bake 30 minutes, then remove lid and bake another 20 minutes, until loaf is beautifully browned.
Cool on a rack.
Yield: 1 big loaf.
Saturday, 24 December 2016
Homemade Bread.
- Recipe: No-Knead Multigrain Bread — Recipes from The Kitchn | The Kitchn: "No-Knead Multigrain Bread"
- Multigrain Bread - Vanilla And Bean:
- How To Shape a Round Loaf of Bread Dough: The Video | The Kitchn:
- Homemade Bread: The Next Frontier - hummingbird high || a desserts and baking blog:
- Gluten-Free Goddess Recipes: Gluten-Free Cranberry Bread Recipe:
- Nourishing Nut & Seed Bread:
- The Life-Changing Loaf of Bread - My New Roots
- Five Seed No-Knead Bread | food to glow
- 25 of the Best Gluten-Free Bread Recipes - Free-From Heaven | Free-From Heaven
- Multigrain Bread - Vanilla And Bean:
- How To Shape a Round Loaf of Bread Dough: The Video | The Kitchn:
- Homemade Bread: The Next Frontier - hummingbird high || a desserts and baking blog:
- Gluten-Free Goddess Recipes: Gluten-Free Cranberry Bread Recipe:
- Nourishing Nut & Seed Bread:
- The Life-Changing Loaf of Bread - My New Roots
- Five Seed No-Knead Bread | food to glow
- 25 of the Best Gluten-Free Bread Recipes - Free-From Heaven | Free-From Heaven
Friday, 23 December 2016
Five Seed Gluten Free Bread. By Amelia Freer.
Bread by Nutritional Therapist Amelia Freer.


Pour the almonds milk (1+1/3 cup or 325 ml) in Pyrex measuring jug - heat in microwave oven until warm to the touch.
Wisk two egg, add 1 teaspoon cider apple vinegar and gradually stir in the warm almonds milk.
In a large mixing bowl, combine:
- 225g gluten free brown bread flour (mine is from Sainsbury)
- 225g teff flour (mine is from Sainsbury)
- 1/2 teaspoon sea salt
- 2 tablespoons coconut blossom nectar (mine is from "Spill The Beans" Wimborne - health food shop).
- 10g fast action yeast
- 1 tablespoon each of
pumpkin
sesame
sunflower
linseeds (also known as common flax or flax)
(mine is from Sainsbury - seed mix)
chia seeds (mine is from Sainsbury).
Using a sturdy wooden spoon stir until well combined.
Pour the "wet" mixture from the small mixing bowl into the large mixing bowl with the dry ingredients.
Add 3 tablespoon melted coconut oil (or ghee) - stir until well combined.
When ready to shape and bake the loaf, sprinkle your work surface with a little flour.
Turn the dough out onto the counter.
Sprinkle the dough piece with a little more flour and shape into round loaf.
Cover and let the loaf rise for about 1 1/2 to 2 hours at room temperature, until nearly doubled in bulk.
A half hour before baking, preheat the oven to 220 degrees C/450°F.
Place a Dutch oven, or other heavy-bottomed pot with a lid, into the oven as it heats.
When the loaf have risen, quickly cut slashes 1 cm deep in the top of with a serrated knife.
Gently and carefully but quickly transfer the loaf to hot Dutch oven.
Cover and place back in the oven.
Bake for 20 minutes, then remove the cover from the Dutch oven.
Bake for another 10 to 15 minutes, until the loaf is dark brown, sound hollow when tapped on the bottom, and the interior registers 87.78 degrees celsius/190°F on an instant-read thermometer.
Allow to cool fully on a rack before slicing and eating.

Note:
To make No-Knead Bread - cover the bowl and let it sit at room temperature for 8 hours or overnight.
If necessary, you can refrigerate the dough after this fermentation period and keep it refrigerated for up to a week.
Refrigerating for a few hours also helps make the dough easier to work with and improves the flavor.
Pour the almonds milk (1+1/3 cup or 325 ml) in Pyrex measuring jug - heat in microwave oven until warm to the touch.
Wisk two egg, add 1 teaspoon cider apple vinegar and gradually stir in the warm almonds milk.
In a large mixing bowl, combine:
- 225g gluten free brown bread flour (mine is from Sainsbury)
- 225g teff flour (mine is from Sainsbury)
- 1/2 teaspoon sea salt
- 2 tablespoons coconut blossom nectar (mine is from "Spill The Beans" Wimborne - health food shop).
- 10g fast action yeast
- 1 tablespoon each of
pumpkin
sesame
sunflower
linseeds (also known as common flax or flax)
(mine is from Sainsbury - seed mix)
chia seeds (mine is from Sainsbury).
Using a sturdy wooden spoon stir until well combined.
Pour the "wet" mixture from the small mixing bowl into the large mixing bowl with the dry ingredients.
Add 3 tablespoon melted coconut oil (or ghee) - stir until well combined.
When ready to shape and bake the loaf, sprinkle your work surface with a little flour.
Turn the dough out onto the counter.
Sprinkle the dough piece with a little more flour and shape into round loaf.
Cover and let the loaf rise for about 1 1/2 to 2 hours at room temperature, until nearly doubled in bulk.
A half hour before baking, preheat the oven to 220 degrees C/450°F.
Place a Dutch oven, or other heavy-bottomed pot with a lid, into the oven as it heats.
When the loaf have risen, quickly cut slashes 1 cm deep in the top of with a serrated knife.
Gently and carefully but quickly transfer the loaf to hot Dutch oven.
Cover and place back in the oven.
Bake for 20 minutes, then remove the cover from the Dutch oven.
Bake for another 10 to 15 minutes, until the loaf is dark brown, sound hollow when tapped on the bottom, and the interior registers 87.78 degrees celsius/190°F on an instant-read thermometer.
Allow to cool fully on a rack before slicing and eating.
Note:
To make No-Knead Bread - cover the bowl and let it sit at room temperature for 8 hours or overnight.
If necessary, you can refrigerate the dough after this fermentation period and keep it refrigerated for up to a week.
Refrigerating for a few hours also helps make the dough easier to work with and improves the flavor.
Monday, 19 December 2016
Grandmother's Buttermilk Cornbread.
Grandmother's Buttermilk Cornbread Recipe - Allrecipes.com
Recipe By:Bethanyweathersby - sweet and moist!

Ingredients
1/2 cup (113 gram) butter
2/3 cup white sugar
2 eggs
1 cup buttermilk
1/2 teaspoon baking soda
1 cup cornmeal
1 cup all-purpose flour
1/2 teaspoon salt

Directions
Preheat oven to 175C.
Grease an 20 cm square pan (or Cast Iron Skillet).
Melt butter in large microwavable bowl.
Stir in sugar.
Quickly add eggs and beat until well blended.
In separate container combine buttermilk with baking soda and stir into mixture in pan.
Stir in cornmeal, flour, and salt until well blended and few lumps remain.
Pour batter into the prepared pan or Cast Iron Skillet.
Bake in the preheated oven for 30 minutes (40 minutes when you use whole wheat flour), or until a toothpick inserted in the center comes out clean.
Note: You could make this in a cast iron skillet.
Greased skillet with vegetable oil and put it in the oven while assembling the recipe.
Mix all ingredients in the pan where you melt the butter in. Less dishes.
Pour batter into the hot skillet.
Bake for 25 minutes.

Substitute for Buttermilk:
- 1 cup milk
- 1 tablespoon lemon juice or 1 tablespoon vinegar
Combine ingredients and let stand 5 minutes.
After 5 minutes, mix together well and use as buttermilk in any recipe!
OR:
If you warm the milk in the microwave for about 30 seconds, then add the vinegar or lemon juice it will be sour and ready to use immediately!
I use a regular pot to melt my butter in.
After the butter has melted I proceed with adding the rest of the ingredients in that same pot.
I do NOT get a separate bowl for mixing in.
After all the ingredients are mixed in the pot I pour the batter into a baking pan.
I do NOT mix everything in the pan I'm baking it in.
I do NOT keep the butter and sugar mixture out when mixing the rest of the ingredients.
Hope that helps.
Recipe By:Bethanyweathersby - sweet and moist!
Ingredients
1/2 cup (113 gram) butter
2/3 cup white sugar
2 eggs
1 cup buttermilk
1/2 teaspoon baking soda
1 cup cornmeal
1 cup all-purpose flour
1/2 teaspoon salt
Directions
Preheat oven to 175C.
Grease an 20 cm square pan (or Cast Iron Skillet).
Melt butter in large microwavable bowl.
Stir in sugar.
Quickly add eggs and beat until well blended.
In separate container combine buttermilk with baking soda and stir into mixture in pan.
Stir in cornmeal, flour, and salt until well blended and few lumps remain.
Pour batter into the prepared pan or Cast Iron Skillet.
Bake in the preheated oven for 30 minutes (40 minutes when you use whole wheat flour), or until a toothpick inserted in the center comes out clean.
Note: You could make this in a cast iron skillet.
Greased skillet with vegetable oil and put it in the oven while assembling the recipe.
Mix all ingredients in the pan where you melt the butter in. Less dishes.
Pour batter into the hot skillet.
Bake for 25 minutes.
Substitute for Buttermilk:
- 1 cup milk
- 1 tablespoon lemon juice or 1 tablespoon vinegar
Combine ingredients and let stand 5 minutes.
After 5 minutes, mix together well and use as buttermilk in any recipe!
OR:
If you warm the milk in the microwave for about 30 seconds, then add the vinegar or lemon juice it will be sour and ready to use immediately!
I use a regular pot to melt my butter in.
After the butter has melted I proceed with adding the rest of the ingredients in that same pot.
I do NOT get a separate bowl for mixing in.
After all the ingredients are mixed in the pot I pour the batter into a baking pan.
I do NOT mix everything in the pan I'm baking it in.
I do NOT keep the butter and sugar mixture out when mixing the rest of the ingredients.
Hope that helps.
Tuesday, 13 December 2016
Saturday, 19 November 2016
Five Seed No-Knead Bread. By Kellie Anderson.
Based on South African seed bread, this loaf is chewy and very tasty.
No kneading and one rise make this loaf a great choice for the novice bread maker or those who just want fresh bread quickly.
As you can see from the list of seeds you get a whack of good fats and Vitamin E as well as fibre, but you will like it more for the taste.

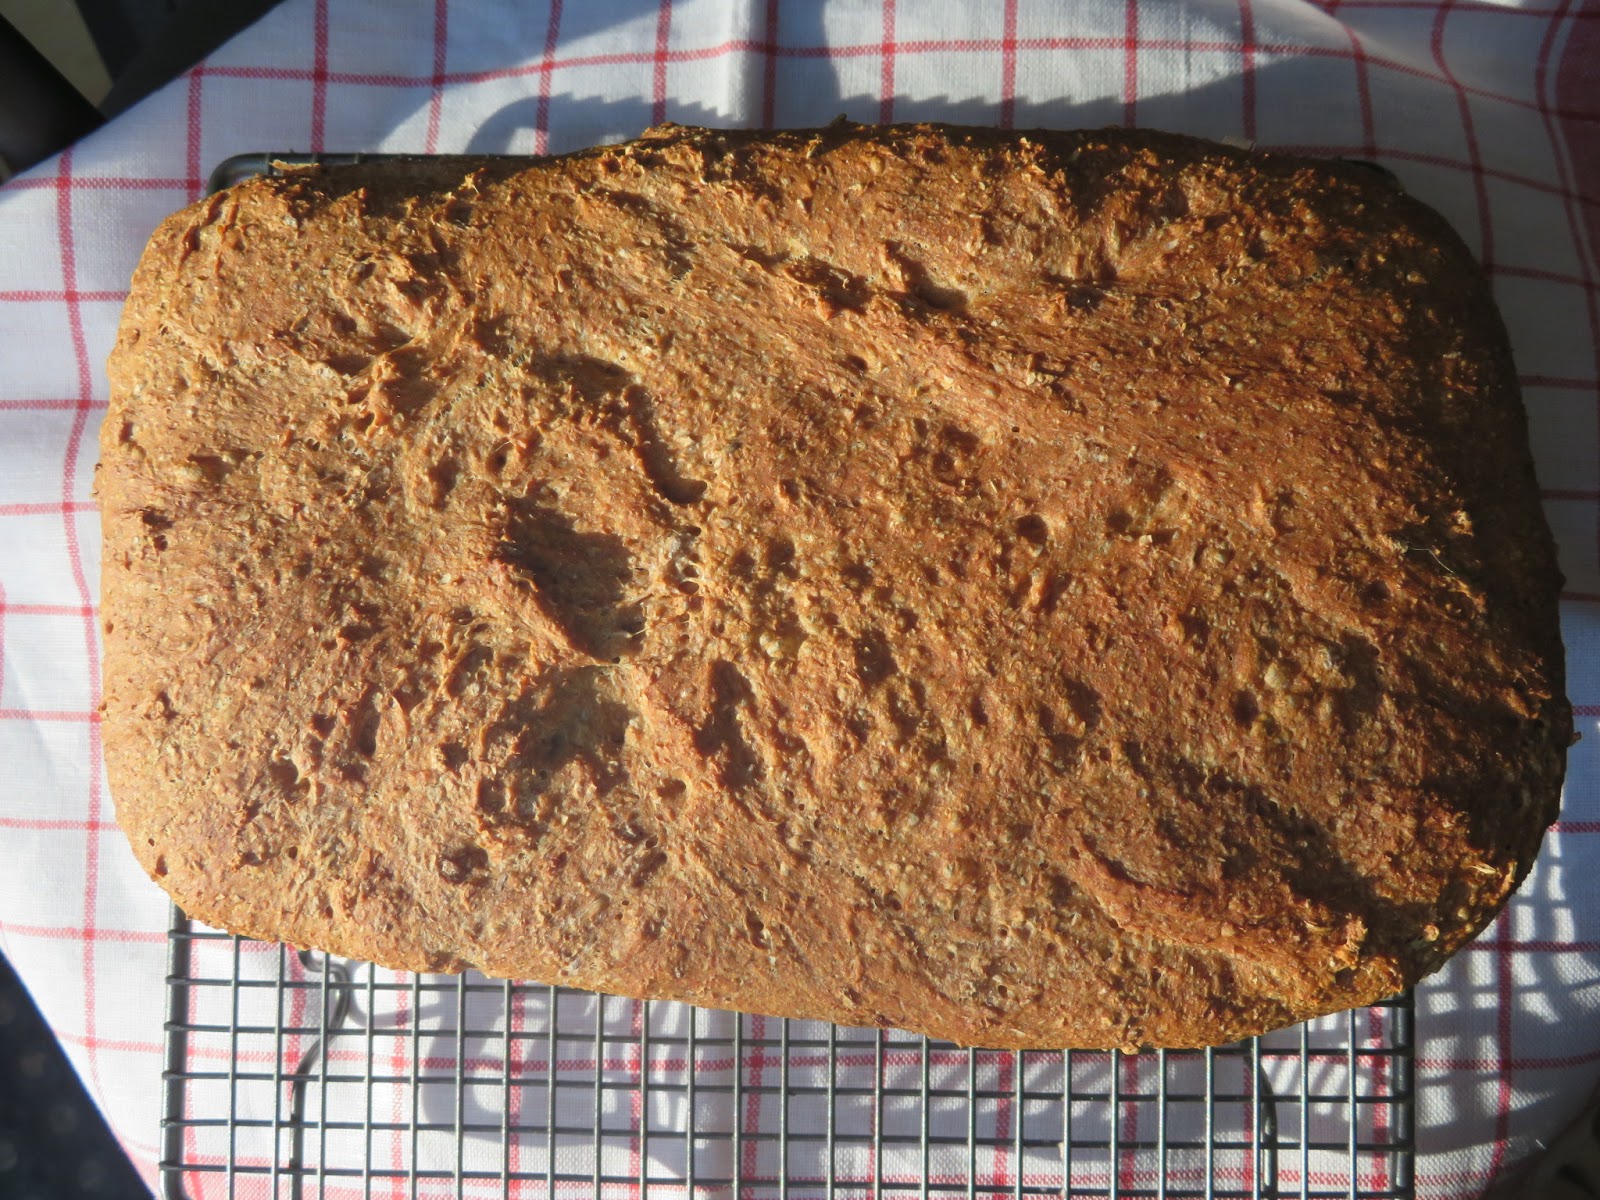
Makes 2 small loaves, about 16 slices each. (I made one!)
600g strong wholemeal flour (or spelt flour, if available)
2 x 7g packets dried (quick) yeast OR 2 tsps of it
1 heaped tsp salt
25 g linseeds
50 g pumpkin seeds
50 g sunflower seeds
25 g poppyseeds
1 tsp caraway or fennel seeds (optional)
1 tbsp honey or barley malt syrup
550ml warm water (hand-hot)

Oil and flour two 900 g (2 lb) bread tins, or one large baking sheet.
Toast the seeds in a dry pan for 3-4 minutes and add to a large wide bowl, together the flour, yeast and salt.
Use a hand to thoroughly mix the dry ingredients.
In a separate jug stir the honey or malt extract into 550 ml of hand-hot water.
Pour the water into the dry ingredients and lightly mix until you have a soft dough and somewhat sloppy dough (vigorous mixing toughens the bread).
I find it easiest to achieve a light dough by making a claw of one hand and mixing, but use a large metal spoon if you like.
Divide the alarmingly-loose dough between the two tins, or form into two rounds on a greased and floured baking sheet – cornmeal is good here.
Cover the dough loosely with either cling film or a clean tea towel.
If you are making rounds, dust the dough with flour and cover with a tea towel.
Leave the dough to rise in a warm, draught-free place until nearly doubled in size – about 40 minutes to one hour.
It may not rise as high as unseeded bread.
Meanwhile heat your oven to 200C.
Bake the bread on the middle shelf for about 35 minutes.
Remove from the tin (usually requires a firm whack on the work surface to loosen) and check that the bottom sounds hollow when tapped.
If not, place back in the oven for a further five or so minutes – without the tin.
Cool completely on a wire rack.
Use one loaf and pop the other into your freezer for later.
The breads keep well for three days and makes terrific toast.
Really lovely bread.
Highly recommended.

Kellie Anderson is an Edinburgh-based food writer, recipe developer, blogger, and also a cancer health educator and nutrition adviser with cancer support charity, Maggie's Cancer Caring Centres.
Her healthy food blog: kelliesfoodtoglow.com.
No kneading and one rise make this loaf a great choice for the novice bread maker or those who just want fresh bread quickly.
As you can see from the list of seeds you get a whack of good fats and Vitamin E as well as fibre, but you will like it more for the taste.
Makes 2 small loaves, about 16 slices each. (I made one!)
600g strong wholemeal flour (or spelt flour, if available)
2 x 7g packets dried (quick) yeast OR 2 tsps of it
1 heaped tsp salt
25 g linseeds
50 g pumpkin seeds
50 g sunflower seeds
25 g poppyseeds
1 tsp caraway or fennel seeds (optional)
1 tbsp honey or barley malt syrup
550ml warm water (hand-hot)
Oil and flour two 900 g (2 lb) bread tins, or one large baking sheet.
Toast the seeds in a dry pan for 3-4 minutes and add to a large wide bowl, together the flour, yeast and salt.
Use a hand to thoroughly mix the dry ingredients.
In a separate jug stir the honey or malt extract into 550 ml of hand-hot water.
Pour the water into the dry ingredients and lightly mix until you have a soft dough and somewhat sloppy dough (vigorous mixing toughens the bread).
I find it easiest to achieve a light dough by making a claw of one hand and mixing, but use a large metal spoon if you like.
Divide the alarmingly-loose dough between the two tins, or form into two rounds on a greased and floured baking sheet – cornmeal is good here.
Cover the dough loosely with either cling film or a clean tea towel.
If you are making rounds, dust the dough with flour and cover with a tea towel.
Leave the dough to rise in a warm, draught-free place until nearly doubled in size – about 40 minutes to one hour.
It may not rise as high as unseeded bread.
Meanwhile heat your oven to 200C.
Bake the bread on the middle shelf for about 35 minutes.
Remove from the tin (usually requires a firm whack on the work surface to loosen) and check that the bottom sounds hollow when tapped.
If not, place back in the oven for a further five or so minutes – without the tin.
Cool completely on a wire rack.
Use one loaf and pop the other into your freezer for later.
The breads keep well for three days and makes terrific toast.
Really lovely bread.
Highly recommended.
Kellie Anderson is an Edinburgh-based food writer, recipe developer, blogger, and also a cancer health educator and nutrition adviser with cancer support charity, Maggie's Cancer Caring Centres.
Her healthy food blog: kelliesfoodtoglow.com.
Tuesday, 5 April 2016
Get to Know 6 Great Grains.

Grain Cooking Chart : Article - GourmetSleuth
Grain - Cooking Time
Amaranth 20 minutes
Buckwheat 10 minutes
Bulgur 10 to 15 minutes
Millet 25 minutes
Quinoa 10 minutes
Teff 20 minutes
Many of these grains can be cooked just as you prepare rice.
To do this, boil water or stock—look to your grain's packaging for grain-to-liquid ratios since adding too much water can turn your dish into porridge.
Once the liquid has come to a boil, add the grains and turn the heat to simmer.
After several minutes (see the cooking times, below), the grain should absorb most of the liquid.
Fluff the grain with a fork and serve.
Amaranth
The burgundy amaranth plant was a major crop of the ancient Aztecs, but it virtually vanished until the 1970s.
Today, the plant's tiny blond seeds are reappearing as an alternative to cereal grains like wheat and oats (amaranth is a pseudocereal, but thanks to its high protein content and similar use, it's often grouped in the same category).
The slightly grassy, earthy flavor is somewhat stronger than that of rice, so it helps to use flavorful spices when cooking with amaranth.
"You can toast it to bring out a more nutty, toasted flavor. Just swirl it in a dry skillet [before cooking]," says Asbell.
• Key nutrients: The seeds are between 14 and 16 percent protein, packed with the amino acid lysine, and have about 8 grams of fiber per cooked cup. They're also gluten free.
• How to cook with it: Amaranth seeds can often be sticky, so they're not ideal for a pilaf dish.
Instead, Asbell suggests using them as a thickener in soups or cooking them as a breakfast porridge.
She also creates a half-amaranth polenta, mixing it with millet or corn.
You can pop the seeds to create a smaller-than-popcorn snack.
Or try amaranth flour in cookies, breads, and muffins—just be sure to mix it with wheat flour since the grain is gluten free and won't rise.
Buckwheat
It's likely you first tasted buckwheat flour in a pancake.
But the crop—a pseudocereal that's really part of the rhubarb family—is also what gives Japanese soba noodles, French crepes, and the Russian porridge kasha their wheaty taste.
"It's got a really strong flavor," says Asbell. "It's a little stronger than whole wheat flour. It's a wonderful, toasty flavor."
• Key nutrients: Buckwheat has a high amino acid content and delivers 230 milligrams of potassium and about 6 grams of protein per cup. It is also gluten free.
• How to cook with it: Next time you bake bread or muffins, or cook waffles, substitute half of your recipe's whole wheat flour with buckwheat flour.
Buckwheat groats—the plant's seeds—are perfect for pilaf-type dishes.
Asbell suggests sautéing the groats in a pan before cooking to amplify the flavor.
"Substitute them freely for rice in almost any recipe," says Rebecca Wood, author of The Splendid Grain, who uses the groats in stir-fries.
Bulgur
A favorite in the Middle East, bulgur is a type of cracked wheat kernel that has been precooked and dried. The resulting grain is light tan in color, slightly chewy, with a mild flavor that works well with many dishes.
• Key nutrients: Bulgur packs a lot of fiber per cup (about 8 grams) and close to 6 grams of protein.
• How to cook with it: "Bulgur is very versatile. You can pretty much use it in anything," says Asbell. "It's a classic for tabbouleh and salad." For a quick, pilaf-type meal, Asbell suggests adding sautéed onion to bulgur cooked in chicken stock. Or top a green salad with a heaping portion of fluffy bulgur.
Millet
Millet is a staple in much of the world, but in America it's typically used as bird feed.
That said, the grain is making a resurgence with humans who appreciate its high protein content and versatility.
"It's very mild and soft. It's yellow. It's very pretty," says Asbell.
• Key nutrients: Millet is high in protein (about 6 grams per cooked cup) and gluten free.
• How to cook with it: Its mild flavor means you can cook millet in many ways, so feel free to use your imagination. Boil it with plenty of water and you'll have an oatmeal-type porridge. Use less water and you'll make pilaf. "It makes a wonderful polenta. It's delicious and so much better for you" than traditional corn polenta, says Wood, whose favorite use of millet is alongside buckwheat in a breakfast waffle. "Why limit yourself to pasta and bread?" she asks. "Millet [and] all of these grains have such a venerable history."
Quinoa
Though quinoa (pronounced KEEN-wah) was used centuries ago by the Incas and continues to be a staple of the South American diet, it only started gaining traction in the United States about three decades ago. Since then, the United Nations has praised the crop's ample protein content, and Americans have fallen for its mild, nutty flavor and quick preparation. If you've yet to cultivate a fondness for ancient crops, try quinoa—a pseudocereal that's a relative of Swiss chard and beets—which is a great gateway "grain."
• Key nutrients: Quinoa packs about 8 grams of protein per cooked cup. And, because it contains all nine essential amino acids, it's a complete protein. It's also gluten free.
• How to cook with it: If you can whip up a bowl of rice, you can cook quinoa—it's often eaten as a pilaf and cooks just as quickly. In the past, you'd have had to wash the grains under water before cooking to remove a bitter residue that surrounds each seed. But according to Wood and Asbell, most of the quinoa for sale today has been prewashed to avoid the inconvenient step. You can get creative by trying a recipe Asbell created, which substitutes quinoa for typical breadcrumbs: Dip shrimp in egg, coat with partially cooked quinoa, and bake. As an alternative to pilaf, look for quinoa flakes that you can add to hot cereal or use flakes to create homemade granola.
Teff
Many Ethiopians live off this grain, which they use as flour to create a traditional flatbread. The poppy seed–sized seeds are increasingly appearing stateside, thanks to their sweet flavor. "It's incredibly rich, almost chocolate-like. It's wonderfully complex," says Wood, who uses teff flour in baking.
• Key nutrients: The grain is high in iron and contains 90 milligrams of calcium and nearly 10 grams of protein per cooked cup. Teff is a gluten-free grain.
• How to cook with it: The miniature grain's chocolaty flavor is ideal for a cream-of-wheat-type porridge, which Asbell spikes with sweetener and fresh fruit. You can also use teff to create polenta, or sprinkle the raw seeds into baked goods as you would poppy seeds. Baking breads, muffins, and cakes with teff flour changes the flavor of foods that call for traditional wheat flour.
- Get to Know 6 Great Grains: Diabetes Forecast®
- Can i use Buckwheat instead of Bulger Wheat? | Yahoo Answers
You absolutely may substitute buckwheat instead of bulgur wheat.
They take the same amount of liquid, and the same amount of time to cook.
You should not have to make any adjustment at all to your recipe for that substitution.
The flavor will be a little different - buckwheat is a little more floral of a flavor, if that makes any sense, but it is wonderful.
Obviously, avoid the gluten grains - wheat, barley, rye, triticale, farro. But enjoy the rest!
Grains/Зерно.
Sunday, 13 December 2015
Chilli pumpkin cornbread, Hugh Fearnley-Whittingstall's.
Chilli pumpkin cornbread - Saga
Cornbread is a classic American dish often served with chilli.
There are many different variations of the recipe and this one uses chopped chillies to give it some extra kick.
Ingredients
250g cornmeal or fine polenta
250g plain white flour
4 tsp baking powder
2 tsp fine sea salt
1 tsp bicarbonate of soda
4 eggs
2 tbsp runny honey
300ml buttermilk
300ml whole milk
50g unsalted butter, melted (plus a little extra for greasing)
½ green jalapeno chilli, deseeded and finely chopped
1 red Hungarian hot wax chilli (or other medium-hot red chilli), deseeded and finely chopped
400g crown prince or other squash, peeled and cut into 1cm cubes
Method
Preheat the oven to 220C/gas 7.
Butter a baking tin about 20cm x 30cm and at least 5cm deep, and line with baking parchment.
Combine the cornmeal, flour, baking powder, salt and bicarbonate of soda in a large bowl.
Whisk together the eggs, honey, buttermilk, milk and melted butter in another bowl or large jug.
Pour the wet ingredients into the dry and mix until everything is just combined.
Add the chillies and pumpkin and gently mix, then pour the mixture into the prepared tin.
Bake for about 20 minutes or until the cornbread is golden and has shrunk slightly away from the sides of the tin.
Cut into squares and serve warm.
Cornbread is a classic American dish often served with chilli.
There are many different variations of the recipe and this one uses chopped chillies to give it some extra kick.
Ingredients
250g cornmeal or fine polenta
250g plain white flour
4 tsp baking powder
2 tsp fine sea salt
1 tsp bicarbonate of soda
4 eggs
2 tbsp runny honey
300ml buttermilk
300ml whole milk
50g unsalted butter, melted (plus a little extra for greasing)
½ green jalapeno chilli, deseeded and finely chopped
1 red Hungarian hot wax chilli (or other medium-hot red chilli), deseeded and finely chopped
400g crown prince or other squash, peeled and cut into 1cm cubes
Method
Preheat the oven to 220C/gas 7.
Butter a baking tin about 20cm x 30cm and at least 5cm deep, and line with baking parchment.
Combine the cornmeal, flour, baking powder, salt and bicarbonate of soda in a large bowl.
Whisk together the eggs, honey, buttermilk, milk and melted butter in another bowl or large jug.
Pour the wet ingredients into the dry and mix until everything is just combined.
Add the chillies and pumpkin and gently mix, then pour the mixture into the prepared tin.
Bake for about 20 minutes or until the cornbread is golden and has shrunk slightly away from the sides of the tin.
Cut into squares and serve warm.
Wednesday, 4 November 2015
Sourdough bread.
Apple Sourdough Bread Starter - Recipe by Kirsten Dixon:
Apple Sourdough Bread Starter
Author: Kirsten Dixon
Recipe type: Bread
To make your own sourdough bread starter, begin with good ingredients.
Some people use non-chlorinated, purified or distilled water and only organic flour so there aren’t any chemicals or pesticides that would inhibit lactobacillus growth.
It’s a personal choice to take those extra steps but since you are creating a starter batch that will be around for a long time, why not make it as pure as possible?
INGREDIENTS
2 Granny Smith (or other) tart green apples
6 tablespoons sugar
3 cups water
2½ cups all-purpose flour
INSTRUCTIONS
Cut up the apples into chunks and place in a bowl (I leave the skin on but you can peel the apple if you prefer), add in the sugar and ½ cup of the water.
Cover the bowl.
Let it sit for about a week in a warm place in the kitchen, checking on it now and then.
If for some reason the apple has dried out, add in a little more water.
The apple will soften and turn into something that looks like applesauce.
Make sure your sourdough container is well washed.
Add in the flour, the remaining water, and the apple mash.
That’s it.
Set the covered starter in a warm place and now you have a living pet that has to be fed and watered, sometimes every day.
To maintain your sourdough, the general rule is to add in equal weight amounts of flour and water (roughly 1 cup flour and ½ cup water) as you use the sourdough.
If you don’t bake enough to use sourdough every week, then you’ll need to add in, or “feed” the starter with additional flour and water.
You might have to remove a little bit of the old starter to add in new flour and water so you don’t outgrow your container.
If you don’t use your sourdough for an extended period of time, place it into the refrigerator or freezer until ready to reactivate.
NOTES
Makes about 4 cups of starter.
Related Recipes:
- Best-selling author William Alexander: Levain, sourdough, starter...call it want you want — it is the secret to authentic, yeasty, artisan bread. certainly read!
- Basic sourdough bread | LITTLE SCANDINAVIAN:
- Links | Northwest Sourdough - Sourdough Bread Baking Courses:
- Bread Experience bread baking blog:
- New Nordic Cuisine | New Scandinavian Cooking:
Apple Sourdough Bread Starter
Author: Kirsten Dixon
Recipe type: Bread
To make your own sourdough bread starter, begin with good ingredients.
Some people use non-chlorinated, purified or distilled water and only organic flour so there aren’t any chemicals or pesticides that would inhibit lactobacillus growth.
It’s a personal choice to take those extra steps but since you are creating a starter batch that will be around for a long time, why not make it as pure as possible?
INGREDIENTS
2 Granny Smith (or other) tart green apples
6 tablespoons sugar
3 cups water
2½ cups all-purpose flour
INSTRUCTIONS
Cut up the apples into chunks and place in a bowl (I leave the skin on but you can peel the apple if you prefer), add in the sugar and ½ cup of the water.
Cover the bowl.
Let it sit for about a week in a warm place in the kitchen, checking on it now and then.
If for some reason the apple has dried out, add in a little more water.
The apple will soften and turn into something that looks like applesauce.
Make sure your sourdough container is well washed.
Add in the flour, the remaining water, and the apple mash.
That’s it.
Set the covered starter in a warm place and now you have a living pet that has to be fed and watered, sometimes every day.
To maintain your sourdough, the general rule is to add in equal weight amounts of flour and water (roughly 1 cup flour and ½ cup water) as you use the sourdough.
If you don’t bake enough to use sourdough every week, then you’ll need to add in, or “feed” the starter with additional flour and water.
You might have to remove a little bit of the old starter to add in new flour and water so you don’t outgrow your container.
If you don’t use your sourdough for an extended period of time, place it into the refrigerator or freezer until ready to reactivate.
NOTES
Makes about 4 cups of starter.
Related Recipes:
- Best-selling author William Alexander: Levain, sourdough, starter...call it want you want — it is the secret to authentic, yeasty, artisan bread. certainly read!
- Basic sourdough bread | LITTLE SCANDINAVIAN:
- Links | Northwest Sourdough - Sourdough Bread Baking Courses:
- Bread Experience bread baking blog:
- New Nordic Cuisine | New Scandinavian Cooking:
Thursday, 29 October 2015
Choosing the best flour.
Coming on strong: choosing the best flour from
http://www.danlepard.com/2015/12/05/coming-on-strong/
On bags of flour in UK supermarkets the words “strong white” and “plain” – and occasionally the ridiculous “strong plain” label, courtesy of someone presumably doing their bit to discourage all home baking – are emblazoned on the packs as if they meant something.
Now when I write a recipe and in the ingredients ask for “strong white flour”, all I mean is go and buy a bag of flour labelled “strong white” and use it.
If you push me, I‘ll explain that in the UK, strong flour is typically flour for breadmaking, and plain flour is flour for cakes and biscuits.
But to be really honest, the truth is much more complex as I frequently use plain flour for bread recipes, and strong white flour for cake recipes.
Note:
Italians and English do not categorise flour in the same way.
Italian flour is graded by colour (technically called extraction rate - that is the extent to which the bran and the germ are extracted from the flour).
It is marked 00 to 04 where 00 is really really white and 04 is rather closer to whole meal.
The exception is Durham flour but let's not go there now.
English flour, on the other hand is graded by both colour (white, brown, whole meal) and by gluten content, or strength (plain, strong, extra strong or words to that effect) and we believe that the stronger the flour, the better the bread.
All else being equal, stronger flour makes bread that rises higher and has a more evenly textured crumb.
A wheat flour typically milled in Italy, where millers grade their flour by using a ‘zero’ rating. A single zero flour is quite coarse in texture, like very powdery semolina, whereas triple zero is much finer like cornstarch. But everyday flour is usually classed as double zero, or ‘00’.
In cake recipes it can be replaced with plain flour;
in bread, pizza and pasta recipes it can be replaced with strong white bread flour.
It is often lower in protein than British flours and so produces a much crisper crust in bread, and a finer texture in cakes.
Using Italian 00 instead of plain flour: If baking powder is used reduce it slightly. By the way, Italian 00 produces a lovely light scone.
Using plain flour instead of Italian 00: in breadmaking, use a mixture of half strong white (see below) and half plain flour, but the dough produced will not be as stretchy and extensible. 00 produces a much crisper result that can’t be imitated with either flour. In cake making use slightly more baking powder but no other changes
- New to Alternative Flour? Start With These 9 Recipes:
http://www.danlepard.com/2015/12/05/coming-on-strong/
On bags of flour in UK supermarkets the words “strong white” and “plain” – and occasionally the ridiculous “strong plain” label, courtesy of someone presumably doing their bit to discourage all home baking – are emblazoned on the packs as if they meant something.
Now when I write a recipe and in the ingredients ask for “strong white flour”, all I mean is go and buy a bag of flour labelled “strong white” and use it.
If you push me, I‘ll explain that in the UK, strong flour is typically flour for breadmaking, and plain flour is flour for cakes and biscuits.
But to be really honest, the truth is much more complex as I frequently use plain flour for bread recipes, and strong white flour for cake recipes.
Note:
Italians and English do not categorise flour in the same way.
Italian flour is graded by colour (technically called extraction rate - that is the extent to which the bran and the germ are extracted from the flour).
It is marked 00 to 04 where 00 is really really white and 04 is rather closer to whole meal.
The exception is Durham flour but let's not go there now.
English flour, on the other hand is graded by both colour (white, brown, whole meal) and by gluten content, or strength (plain, strong, extra strong or words to that effect) and we believe that the stronger the flour, the better the bread.
All else being equal, stronger flour makes bread that rises higher and has a more evenly textured crumb.
A wheat flour typically milled in Italy, where millers grade their flour by using a ‘zero’ rating. A single zero flour is quite coarse in texture, like very powdery semolina, whereas triple zero is much finer like cornstarch. But everyday flour is usually classed as double zero, or ‘00’.
In cake recipes it can be replaced with plain flour;
in bread, pizza and pasta recipes it can be replaced with strong white bread flour.
It is often lower in protein than British flours and so produces a much crisper crust in bread, and a finer texture in cakes.
Using Italian 00 instead of plain flour: If baking powder is used reduce it slightly. By the way, Italian 00 produces a lovely light scone.
Using plain flour instead of Italian 00: in breadmaking, use a mixture of half strong white (see below) and half plain flour, but the dough produced will not be as stretchy and extensible. 00 produces a much crisper result that can’t be imitated with either flour. In cake making use slightly more baking powder but no other changes
- New to Alternative Flour? Start With These 9 Recipes:
Friday, 19 December 2014
How To Make No-Knead Bread.
How To Make No-Knead Bread | The Kitchn:
A step-by-step illustration of making the famous No-Knead Bread!
This bread is dead simple.
It's ridiculously easy, and very forgiving.
If you're intimidated by baking ratios, volume vs. weight, baking scales, and kneading, this is a great recipe to start with.
It will give you such a delicious loaf, with about five minutes of hands-on time and literally no way to mess it up.
'via Blog this'
A step-by-step illustration of making the famous No-Knead Bread!
This bread is dead simple.
It's ridiculously easy, and very forgiving.
If you're intimidated by baking ratios, volume vs. weight, baking scales, and kneading, this is a great recipe to start with.
It will give you such a delicious loaf, with about five minutes of hands-on time and literally no way to mess it up.
'via Blog this'
Tuesday, 26 November 2013
Cranberry Skillet Cornbread.
Cranberry Skillet Cornbread. | Honest Fare:
CRANBERRY SKILLET CORNBREAD.
For the Thanksgiving table or a perfect use for all that leftover cranberry sauce!
If you don’t have cranberry sauce on hand, you can quickly boil some cranberries in sugar water with a couple
cinnamon sticks until they become tender and a few burst. Just be sure to drain the liquid before adding the cranberries
to the cornbread mixture. I’m also including the recipe for my cranberry sauce here in case you’re interested in that as
well. Also, feel free to use butter, coconut oil, lard or olive oil in this recipe depending on your preference.
YOU NEED:
Skillet Cornbread:
1 cup cranberry sauce, or as much as you have/like
4 Tbs butter, olive oil, lard or coconut oil.
1 1/4 cup medium grind cornmeal
1/2 all-purpose flour
1 1/2 tsp baking powder
1 tap salt
1/4 cup sugar or preferred sweetener (agave, brown sugar, etc)
2 eggs
1 1/4 cup milk, plus more if needed
Cranberry Sauce:
one 12 oz bag cranberries
3/4 cup water
juice from 2 oranges
large piece of orange zest about 2″ long by 1/2″ wide
3/4 – 1 cup sugar
1 cinnamon stick
dash of brandy or rum
CRANBERRY SKILLET CORNBREAD.
For the Thanksgiving table or a perfect use for all that leftover cranberry sauce!
If you don’t have cranberry sauce on hand, you can quickly boil some cranberries in sugar water with a couple
cinnamon sticks until they become tender and a few burst. Just be sure to drain the liquid before adding the cranberries
to the cornbread mixture. I’m also including the recipe for my cranberry sauce here in case you’re interested in that as
well. Also, feel free to use butter, coconut oil, lard or olive oil in this recipe depending on your preference.
YOU NEED:
Skillet Cornbread:
1 cup cranberry sauce, or as much as you have/like
4 Tbs butter, olive oil, lard or coconut oil.
1 1/4 cup medium grind cornmeal
1/2 all-purpose flour
1 1/2 tsp baking powder
1 tap salt
1/4 cup sugar or preferred sweetener (agave, brown sugar, etc)
2 eggs
1 1/4 cup milk, plus more if needed
Cranberry Sauce:
one 12 oz bag cranberries
3/4 cup water
juice from 2 oranges
large piece of orange zest about 2″ long by 1/2″ wide
3/4 – 1 cup sugar
1 cinnamon stick
dash of brandy or rum
Friday, 12 July 2013
Cherry Nut Zucchini Bread
Category: Muffins, Quickbreads, Scones
• 3 eggs
• 2 cups sugar
• 1/2 tsp. almond extract
• 1/4 cup vegetable oil
• 2 cups unpeeled, shredded zucchini
• 3 cups flour
• 1 tsp. baking powder
• 1 tsp. baking soda
• 1/2 cup quartered maraschino cherries
• 3/4 cup chopped walnuts
Combine eggs, sugar, almond extract, veg. oil, stir in zucchini. In separate bowl, combine flour, baking powder and baking soda. Add to egg mixture. Add cherries and walnuts.
Grease/flour 2 large loaf pans & divide dough between them.
Bake at 350 degrees for 50-55 min.
• 3 eggs
• 2 cups sugar
• 1/2 tsp. almond extract
• 1/4 cup vegetable oil
• 2 cups unpeeled, shredded zucchini
• 3 cups flour
• 1 tsp. baking powder
• 1 tsp. baking soda
• 1/2 cup quartered maraschino cherries
• 3/4 cup chopped walnuts
Combine eggs, sugar, almond extract, veg. oil, stir in zucchini. In separate bowl, combine flour, baking powder and baking soda. Add to egg mixture. Add cherries and walnuts.
Grease/flour 2 large loaf pans & divide dough between them.
Bake at 350 degrees for 50-55 min.
Thursday, 31 January 2013
Sprouted Sourdough Bread.
Golubka: Sprouted Sourdough Bread for Fermentation Week:
"Below are some things that I learned from trial and error with different flours, applying Chad Robertson’s technique:
1. You need to be patient. It may take time to get your starter going, but if you feed it every day, it will always respond to your efforts, even if it seems that it never will in the beginning.
2. You have to discard about 80% of the starter every day and replace it with an equal amount of flour/water mixture. You need a reliable kitchen scale to weigh the flour and water. Bakers always use metric conversions as they’re more exact and convenient.
3. Go on with your bread only if the starter is undoubtedly strong and reliable – meaning that it’s falling and rising predictably for several days in a row. If in doubt, wait and feed your starter one more time. When you see a strong starter, you’ll know it.
4. Only a very small amount, about 1 tablespoon of starter, should be used for bread.
5. The starter does not go directly into the bread, you have to make a levain first.
6. The levain must pass a floating test.
7. The time of fermentation needed for ripening of the levain, bulk fermentation, bench rest, and final rise differs hugely from kitchen to kitchen. It depends on room and water temperature, the type of flour used, the amount of wild yeast in the air, how long and often you bake, your disposition that day, and who knows what else. You can begin with the general guidelines, but be flexible and patient.
8. Spelt sourdough will not rise as much as wheat will. Spelt flour makes the dough kind of runny and doesn’t hold shape well. Taste-wise, though, it is delicious.
9. Sprouted flours work very well in sourdough. You can replace regular flour entirely or partially with sprouted flour. 100% sprouted sourdough will make a darker, denser bread.
10. The degree of sourness of your bread depends on the time of fermentation. The longer you let it ferment, the more sour your bread will be.
11. You can delay bulk fermentation and final rise by placing your dough in the refrigerator. By doing that, you can manipulate the process to fit your schedule.
12. You absolutely need an iron cast dutch oven or a combo cooker to bake your sourdough bread if using a home oven. It allows for just the right amount of steam needed in the first 20-30 minutes in the oven.
"Below are some things that I learned from trial and error with different flours, applying Chad Robertson’s technique:
1. You need to be patient. It may take time to get your starter going, but if you feed it every day, it will always respond to your efforts, even if it seems that it never will in the beginning.
2. You have to discard about 80% of the starter every day and replace it with an equal amount of flour/water mixture. You need a reliable kitchen scale to weigh the flour and water. Bakers always use metric conversions as they’re more exact and convenient.
3. Go on with your bread only if the starter is undoubtedly strong and reliable – meaning that it’s falling and rising predictably for several days in a row. If in doubt, wait and feed your starter one more time. When you see a strong starter, you’ll know it.
4. Only a very small amount, about 1 tablespoon of starter, should be used for bread.
5. The starter does not go directly into the bread, you have to make a levain first.
6. The levain must pass a floating test.
7. The time of fermentation needed for ripening of the levain, bulk fermentation, bench rest, and final rise differs hugely from kitchen to kitchen. It depends on room and water temperature, the type of flour used, the amount of wild yeast in the air, how long and often you bake, your disposition that day, and who knows what else. You can begin with the general guidelines, but be flexible and patient.
8. Spelt sourdough will not rise as much as wheat will. Spelt flour makes the dough kind of runny and doesn’t hold shape well. Taste-wise, though, it is delicious.
9. Sprouted flours work very well in sourdough. You can replace regular flour entirely or partially with sprouted flour. 100% sprouted sourdough will make a darker, denser bread.
10. The degree of sourness of your bread depends on the time of fermentation. The longer you let it ferment, the more sour your bread will be.
11. You can delay bulk fermentation and final rise by placing your dough in the refrigerator. By doing that, you can manipulate the process to fit your schedule.
12. You absolutely need an iron cast dutch oven or a combo cooker to bake your sourdough bread if using a home oven. It allows for just the right amount of steam needed in the first 20-30 minutes in the oven.
Monday, 28 January 2013
Fougasse bread recipe by Richard Bertinet.
Fougasse bread recipe by Richard Bertinet - Telegraph:
Richard Bertinet is an award-winning chef and baker with 30 years of experience, who runs the Bertinet Kitchen cookery school in Bath.
One of his most popular breads to teach to budding breadmakers is a fougasse white flatbread (see recipe).
His other favourites include an olive and lavender, a pesto and oven-dried tomato and a light rye dough with gruyère, cumin seeds and roasted onions.
"When making bread, show the dough who is boss," he says. "Do not be scared of it. You are in charge."
And to really crack a recipe, he suggests that we "keep practising it over and over again".
RICHARD'S TIPS
It is always better to make bread by hand to achieve a lighter loaf.
Give time to the dough. The quicker you make it, the quicker it will go stale.
Be accurate about your quantities. I weigh everything, including my water.
Use a good strong white flour such as Canadian Strong White Flour from Waitrose (www.waitrose.com) and fresh yeast is best. If you use dried, only use half of what is recommended as it is often too strong.
Bake at the hottest oven temperature possible and straight onto a baking stone, ideally made from granite or terracotta, never marble. You can buy granite chopping boards in Sainsbury's that do the trick.
To get a really good crust, where all the flavour is, preheat the oven and spray water very finely inside with 15-20 squirts to create steam. Then load the oven and finish with five more squirts and close the door. Bake the last three to four minutes with the oven door open a fraction to give a crisper crust.
Essential tool: a plastic scraper – an "extension of my hands" – which you cut, scrape and do everything with.
Richard Bertinet is an award-winning chef and baker with 30 years of experience, who runs the Bertinet Kitchen cookery school in Bath.
One of his most popular breads to teach to budding breadmakers is a fougasse white flatbread (see recipe).
His other favourites include an olive and lavender, a pesto and oven-dried tomato and a light rye dough with gruyère, cumin seeds and roasted onions.
"When making bread, show the dough who is boss," he says. "Do not be scared of it. You are in charge."
And to really crack a recipe, he suggests that we "keep practising it over and over again".
RICHARD'S TIPS
It is always better to make bread by hand to achieve a lighter loaf.
Give time to the dough. The quicker you make it, the quicker it will go stale.
Be accurate about your quantities. I weigh everything, including my water.
Use a good strong white flour such as Canadian Strong White Flour from Waitrose (www.waitrose.com) and fresh yeast is best. If you use dried, only use half of what is recommended as it is often too strong.
Bake at the hottest oven temperature possible and straight onto a baking stone, ideally made from granite or terracotta, never marble. You can buy granite chopping boards in Sainsbury's that do the trick.
To get a really good crust, where all the flavour is, preheat the oven and spray water very finely inside with 15-20 squirts to create steam. Then load the oven and finish with five more squirts and close the door. Bake the last three to four minutes with the oven door open a fraction to give a crisper crust.
Essential tool: a plastic scraper – an "extension of my hands" – which you cut, scrape and do everything with.
Monday, 29 October 2012
Roasted Beetroot Bread.
Roasted Beetroot Bread.
This bread is unique, delicious and beautiful.
Filled with pastrami, havarti cheese and mustard, it makes a delicious panini sandwich.
Makes 2 loaves.
Night before:
250 ml (1 cup) bread flour
1 ml (1/4 tsp) instant yeast
250 ml (1 cup) lukewarm water
In a large bowl, combine these ingredients and mix with a wooden spoon.
Cover with plastic wrap and let sit on the counter for 12 to 16 hours.
Day of:
250 ml (1 cup) pureed roasted Beetroots plus any juice
125 ml (1/2 cup) stone-ground whole-wheat flour, plus extra for sprinkling
3 ml (3/4 tsp) instant yeast
15 ml (1 tbsp) chopped fresh thyme
8 ml (1 3/4 tsp) salt
675 ml (2 3/4 cups) bread flour (approx)
50 ml (1/4 cup) lukewarm water
Olive oil
Cornmeal
To “night before” mixture, add pureed Beetroots and any juice, whole-wheat flour and instant yeast.
Mix with a wooden spoon till smooth.
Let sit, uncovered, for 10 minutes.
Add thyme and salt; mix till smooth.
Start to add bread flour.
Once it becomes too hard to mix in the bowl, turn dough onto a flat surface and knead for 10 minutes.
This will be a sticky dough, so be careful not to add too much flour.
Add just enough to prevent dough from really sticking to your fingers when kneading.
Add a little olive oil to a clean large bowl.
Place dough in bowl and turn over a few times to very lightly coat all sides of the dough with oil.
Cover with plastic wrap.
Let dough rise for 1 1/2 hours or till double in bulk.
Turn onto a flat surface.
Cut dough in half and mould each half into desired shape.
Place shaped dough on a piece of parchment paper sprinkled with cornmeal.
Spray tops with a little oil spray and cover with plastic wrap for 1 hour or till double in bulk.
Heat oven to 200°C/400°F and place baking stone on centre rack.
Place a cast-iron skillet (filled with lava rocks if you have them) on oven floor or on lowest rack.
When loaves have doubled, sprinkle with a little whole-wheat flour and slash an X on top of each.
Place in hot oven directly on baking stone.
Pour about 250 ml (1 cup) boiling water into hot skillet and close oven door.
Bake for 30 to 35 minutes or till loaves sound hollow when tapped on bottom. (Or stick a meat thermometer into the centre of loaves; when it reads 82°C/180°F they’re ready.)
Let cool on a wire rack.
- No knead to fear bread-baking: Making fresh loaves at home on the rise | canada.com:
- The Knead For Bread – Bread Recipes for Baking Bread: website offers step-by-step, fully illustrated recipes for all kinds of bread and gets about 2,000 visitors a day from around the world.
'via Blog this'
This bread is unique, delicious and beautiful.
Filled with pastrami, havarti cheese and mustard, it makes a delicious panini sandwich.
Makes 2 loaves.
Night before:
250 ml (1 cup) bread flour
1 ml (1/4 tsp) instant yeast
250 ml (1 cup) lukewarm water
In a large bowl, combine these ingredients and mix with a wooden spoon.
Cover with plastic wrap and let sit on the counter for 12 to 16 hours.
Day of:
250 ml (1 cup) pureed roasted Beetroots plus any juice
125 ml (1/2 cup) stone-ground whole-wheat flour, plus extra for sprinkling
3 ml (3/4 tsp) instant yeast
15 ml (1 tbsp) chopped fresh thyme
8 ml (1 3/4 tsp) salt
675 ml (2 3/4 cups) bread flour (approx)
50 ml (1/4 cup) lukewarm water
Olive oil
Cornmeal
To “night before” mixture, add pureed Beetroots and any juice, whole-wheat flour and instant yeast.
Mix with a wooden spoon till smooth.
Let sit, uncovered, for 10 minutes.
Add thyme and salt; mix till smooth.
Start to add bread flour.
Once it becomes too hard to mix in the bowl, turn dough onto a flat surface and knead for 10 minutes.
This will be a sticky dough, so be careful not to add too much flour.
Add just enough to prevent dough from really sticking to your fingers when kneading.
Add a little olive oil to a clean large bowl.
Place dough in bowl and turn over a few times to very lightly coat all sides of the dough with oil.
Cover with plastic wrap.
Let dough rise for 1 1/2 hours or till double in bulk.
Turn onto a flat surface.
Cut dough in half and mould each half into desired shape.
Place shaped dough on a piece of parchment paper sprinkled with cornmeal.
Spray tops with a little oil spray and cover with plastic wrap for 1 hour or till double in bulk.
Heat oven to 200°C/400°F and place baking stone on centre rack.
Place a cast-iron skillet (filled with lava rocks if you have them) on oven floor or on lowest rack.
When loaves have doubled, sprinkle with a little whole-wheat flour and slash an X on top of each.
Place in hot oven directly on baking stone.
Pour about 250 ml (1 cup) boiling water into hot skillet and close oven door.
Bake for 30 to 35 minutes or till loaves sound hollow when tapped on bottom. (Or stick a meat thermometer into the centre of loaves; when it reads 82°C/180°F they’re ready.)
Let cool on a wire rack.
- No knead to fear bread-baking: Making fresh loaves at home on the rise | canada.com:
- The Knead For Bread – Bread Recipes for Baking Bread: website offers step-by-step, fully illustrated recipes for all kinds of bread and gets about 2,000 visitors a day from around the world.
'via Blog this'
No knead bread.

500 grams of flour
10 grams of salt30 grams of butter
7 grams of dry yeast
400 ml of warm water
Tuesday, 22 June 2010

Sunday, 21 February 2010
Russian Black Bread.
The smell of freshly baked bread is one of life’s little wonders! Recipe Here!
Makes 2 loaves
2 packages (1 1/2 tablespoons) active dry yeast
Pinch of sugar
1/2 cup warm water (105 to 115 degrees)
2 cups water
1/4 cup molasses
1/4 cup apple cider vinegar
4 tablespoons unsalted butter
1 ounce unsweetened chocolate
1/2 cup whole-wheat flour
3 cups medium rye flour
3 cups unbleached, all-purpose or bread flour
1 cup bran
2 tablespoons caraway seeds
1/2 teaspoon fennel seeds
1 tablespoon salt
1 tablespoon instant espresso powder
1 tablespoon minced shallots
1/4 cup cornmeal (optional)
1 tablespoon unbleached all-purpose flour (optional)
1 teaspoon caraway seeds (optional)
Special equipment: Spice grinder (optional), instant-read thermometer
1. In a small bowl, combine yeast and sugar with warm water. Stir to dissolve and let stand until foamy, about 10 minutes.
2. Heat two cups water, molasses, vinegar, butter and chocolate until the butter and chocolate are melted. Set aside and let cool to lukewarm warm.
3. Combine whole-wheat, rye and white flours in a large bowl. Set aside.
4. In bowl of a heavy mixer fitted with a paddle attachment, combine two cups mixed flours, bran, 2 tablespoons caraway seeds, fennel seeds, salt, espresso and shallots. At low speed, add yeast and chocolate mixtures. Mix until smooth and beat at medium speed for three minutes. (If you don’t like whole seeds in your bread, grinding them in a spice grinder, coffee grinder or mortar and pestle allows their flavor to come through without the texture. I always make my black bread this way.)
[Note: This, or any bread, can also be made by hand, simply mixing the ingredients in a large bowl with a wooden spoon and kneading the dough on a counter until springy and smooth.]
5. At low speed, add half cup of remaining mixed flours at a time, until dough clears sides of bowl and begins to work its way up paddle. It will be very sticky but firm.
6. Scrape dough off paddle, flour counter well, and knead to make a springy yet dense dough. You might not use all of the flour mixture.
7. Form into a ball and place in a greased bowl. Turn once to grease top. Cover with plastic wrap and let rise in a warm area until doubled, about 1 1/2 to 2 hours. Combine cornmeal, flour and remaining caraway seeds, if using, and set aside.
8. Gently deflate dough. Turn out onto a lightly floured surface. Divide into two portions and form into two rounds or loaves. Loaves should be placed in a loaf pan sprayed with nonstick spray, while rounds should be placed seam down on a greased or parchment-lined baking sheet. Sprinkle loaves with cornmeal mixture, if using. Cover loosely with plastic wrap. Let rise until doubled and puffy, about 45 minutes to one hour. Slash an X into the top of a round before baking it; no such slashing is needed for bread in a loaf pan.
9. Bake in a preheated 350°F oven for 45 to 50 minutes or until loaves are well-browned, or register an internal temperature of 200 to 210°F on an instant-read thermometer. Baking time in your oven may vary — check in on the bread when it is 2/3 to 3/4 of the way through the baking time to make sure it has not super-speedily baked. Remove from baking sheet to cool completely on a rack.
And 'INNOVATIONS in bread baking' Here!

Такой хлеб не купить в обычном супермаркете.
А обычный хлеб что там продается....но можно купить вкусный хлеб в Farm shop.
Он стоит дороже, чем запакованный в полиэтилен из супермаркета.
Распространенная практика среди знакомых мне англичан - печь хлеб дома.
Это несложно. Если пользоваться Breadmaker засыпая туда готовую купленную смесь.
Но можно и самому замесить тесто и испечь хлеб в обычной электрической печи, что и сделал Brian.
Makes 2 loaves
2 packages (1 1/2 tablespoons) active dry yeast
Pinch of sugar
1/2 cup warm water (105 to 115 degrees)
2 cups water
1/4 cup molasses
1/4 cup apple cider vinegar
4 tablespoons unsalted butter
1 ounce unsweetened chocolate
1/2 cup whole-wheat flour
3 cups medium rye flour
3 cups unbleached, all-purpose or bread flour
1 cup bran
2 tablespoons caraway seeds
1/2 teaspoon fennel seeds
1 tablespoon salt
1 tablespoon instant espresso powder
1 tablespoon minced shallots
1/4 cup cornmeal (optional)
1 tablespoon unbleached all-purpose flour (optional)
1 teaspoon caraway seeds (optional)
Special equipment: Spice grinder (optional), instant-read thermometer
1. In a small bowl, combine yeast and sugar with warm water. Stir to dissolve and let stand until foamy, about 10 minutes.
2. Heat two cups water, molasses, vinegar, butter and chocolate until the butter and chocolate are melted. Set aside and let cool to lukewarm warm.
3. Combine whole-wheat, rye and white flours in a large bowl. Set aside.
4. In bowl of a heavy mixer fitted with a paddle attachment, combine two cups mixed flours, bran, 2 tablespoons caraway seeds, fennel seeds, salt, espresso and shallots. At low speed, add yeast and chocolate mixtures. Mix until smooth and beat at medium speed for three minutes. (If you don’t like whole seeds in your bread, grinding them in a spice grinder, coffee grinder or mortar and pestle allows their flavor to come through without the texture. I always make my black bread this way.)
[Note: This, or any bread, can also be made by hand, simply mixing the ingredients in a large bowl with a wooden spoon and kneading the dough on a counter until springy and smooth.]
5. At low speed, add half cup of remaining mixed flours at a time, until dough clears sides of bowl and begins to work its way up paddle. It will be very sticky but firm.
6. Scrape dough off paddle, flour counter well, and knead to make a springy yet dense dough. You might not use all of the flour mixture.
7. Form into a ball and place in a greased bowl. Turn once to grease top. Cover with plastic wrap and let rise in a warm area until doubled, about 1 1/2 to 2 hours. Combine cornmeal, flour and remaining caraway seeds, if using, and set aside.
8. Gently deflate dough. Turn out onto a lightly floured surface. Divide into two portions and form into two rounds or loaves. Loaves should be placed in a loaf pan sprayed with nonstick spray, while rounds should be placed seam down on a greased or parchment-lined baking sheet. Sprinkle loaves with cornmeal mixture, if using. Cover loosely with plastic wrap. Let rise until doubled and puffy, about 45 minutes to one hour. Slash an X into the top of a round before baking it; no such slashing is needed for bread in a loaf pan.
9. Bake in a preheated 350°F oven for 45 to 50 minutes or until loaves are well-browned, or register an internal temperature of 200 to 210°F on an instant-read thermometer. Baking time in your oven may vary — check in on the bread when it is 2/3 to 3/4 of the way through the baking time to make sure it has not super-speedily baked. Remove from baking sheet to cool completely on a rack.
And 'INNOVATIONS in bread baking' Here!
Такой хлеб не купить в обычном супермаркете.
А обычный хлеб что там продается....но можно купить вкусный хлеб в Farm shop.
Он стоит дороже, чем запакованный в полиэтилен из супермаркета.
Распространенная практика среди знакомых мне англичан - печь хлеб дома.
Это несложно. Если пользоваться Breadmaker засыпая туда готовую купленную смесь.
Но можно и самому замесить тесто и испечь хлеб в обычной электрической печи, что и сделал Brian.
Subscribe to:
Posts (Atom)