From Rachel Khoo’s Kitchen Notebook.
Ingredients
1 tbsp olive oil
2 cooking chorizo, around 350g, cut into 2cm chunks
2 onions, diced
1 bay leaf
2 garlic cloves, sliced
1 jar flame-grilled red peppers, drained and roughly chopped
1 x 400g tin chickpeas, drained and rinsed
1 x 400g tin chopped tomatoes
750 ml chicken or vegetable stock
Small bunch of parsley, tough stalks removed and roughly chopped
Method
Warm the olive oil over a medium heat in a medium-sized saucepan or casserole dish and sauté the chorizo for a couple of minutes, until it releases its spicy red fat and just begins to take on a little colour.
Remove the chorizo from the pan and reserve in a bowl.
Lower the heat a little and gently fry the onions with the bay leaf and a pinch of salt, stirring from time to time, until soft.
This should take around 15 minutes.
Add the garlic and sauté for a further minute.
Return the chorizo to the pan with the peppers and chickpeas and stir for a minute.
Add the tomatoes and stock and simmer, uncovered, for 15 minutes.
Taste and adjust the seasoning if necessary.
Stir in half of the parsley and serve in warmed bowls with the rest of the parsley scattered over the top, with some crusty bread to mop up the sauce.

Read the book and then get cooking. Food. Recipe.
Tuesday, 29 November 2016


Chorizo and Chickpea Soup by Jamie Oliver.
Ingredients
olive oil
150 g iberico chorizo sausage , finely chopped
1 onion , peeled and finely chopped
1 clove garlic , peeled and finely chopped
2 sticks celery , finely chopped
500 g fresh spinach , washed and chopped
8 fresh tomatoes , deseeded and roughly chopped
410 g good-quality tinned cooked chickpeas , drained
1.3 litres organic chicken stock
sea salt
freshly ground black pepper
55 g quality pata negra, Spanish ham or prosciutto , finely chopped
extra virgin olive oil
2 free-range eggs , hard-boiled
Method
I first tasted this soup when I was in Barcelona.
It may not look like the prettiest dish – it actually looks quite frumpy – but the flavours are amazing.
The smoky spicy chorizo and Spanish ham are lovely with the creamy texture of the chickpeas and spinach.
Definitely give this a go.
You will always get good results with this soup, but you'll come up with something really special if you can get hold of the best quality chickpeas, chorizo and ham.
There's a little bit of chopping to do in this recipe, but you can use a food processor if you don't have much time.
Put a couple of tablespoons of olive oil into a large pot and add the chorizo.
Allow to heat up and cook for a couple of minutes until the fat comes out of the chorizo, then add your onion, garlic and celery.
Turn the heat down and cook slowly for 15 minutes with a lid on and without colouring the onions.
Now take the lid off – the smell and colour will be fantastic.
Stir it around and get some colour happening now.
Add your spinach, tomatoes, chickpeas and chicken stock.
Bring to the boil, then lower the heat and simmer for around 40 minutes.
At this point you can remove about a third of the mixture and purée it in a food processor.
Pour it back into the pot, give it a good stir and season to taste with salt and pepper.
Remove from the heat and stir in the pata negra or ham and 2 or 3 tablespoons of good Spanish extra virgin olive oil.
Divide into bowls and grate some hard-boiled egg on top.
The egg was a bit unexpected when I was given this in Barcelona, but it actually adds a lovely richness to it.
olive oil
150 g iberico chorizo sausage , finely chopped
1 onion , peeled and finely chopped
1 clove garlic , peeled and finely chopped
2 sticks celery , finely chopped
500 g fresh spinach , washed and chopped
8 fresh tomatoes , deseeded and roughly chopped
410 g good-quality tinned cooked chickpeas , drained
1.3 litres organic chicken stock
sea salt
freshly ground black pepper
55 g quality pata negra, Spanish ham or prosciutto , finely chopped
extra virgin olive oil
2 free-range eggs , hard-boiled
Method
I first tasted this soup when I was in Barcelona.
It may not look like the prettiest dish – it actually looks quite frumpy – but the flavours are amazing.
The smoky spicy chorizo and Spanish ham are lovely with the creamy texture of the chickpeas and spinach.
Definitely give this a go.
You will always get good results with this soup, but you'll come up with something really special if you can get hold of the best quality chickpeas, chorizo and ham.
There's a little bit of chopping to do in this recipe, but you can use a food processor if you don't have much time.
Put a couple of tablespoons of olive oil into a large pot and add the chorizo.
Allow to heat up and cook for a couple of minutes until the fat comes out of the chorizo, then add your onion, garlic and celery.
Turn the heat down and cook slowly for 15 minutes with a lid on and without colouring the onions.
Now take the lid off – the smell and colour will be fantastic.
Stir it around and get some colour happening now.
Add your spinach, tomatoes, chickpeas and chicken stock.
Bring to the boil, then lower the heat and simmer for around 40 minutes.
At this point you can remove about a third of the mixture and purée it in a food processor.
Pour it back into the pot, give it a good stir and season to taste with salt and pepper.
Remove from the heat and stir in the pata negra or ham and 2 or 3 tablespoons of good Spanish extra virgin olive oil.
Divide into bowls and grate some hard-boiled egg on top.
The egg was a bit unexpected when I was given this in Barcelona, but it actually adds a lovely richness to it.
Sunday, 27 November 2016
Kimchi.
KIMCHI - THE SIMPLE VEGANISTA:
Ingredients
1 medium Napa cabbage, about 2 lbs (savoy, green or any combo works too)
1/4 cup kosher, sea salt or other course salt
6 cups water
3/4 sweet apple (I used fuji), chopped
1/2 small white onion, chopped
1 1/2 inch ginger, chopped
1 – 2 cloves garlic
3 tablespoons Korean chili powder (gochugaru) or 1 tablespoon each cayenne & Hungarian paprika
3 – 4 scallions (green onions), sliced 1 inch
Preparing Cabbage: Quarter cabbage and chop laterally into about 2 inch pieces. Place cabbage in a an extra large bowl or pot. Combine salt with 2 cups of luke warm water, stir to dissolve salt. Pour salt water over the cabbage and add remaining 4 cups, stir to mix. If you can, place a plate or circular baking dish of sorts on top to submerge the cabbage (I used a pie dish), place something with a good amount of weight on top to hold down if necessary (it’s not completely necessary but will help to evenly wilt the cabbage). Give cabbage a good mix every now and then. Let set for 2 hours, up to 12 if you like. I found that 2 – 4 hours was enough and didn’t see much change between the two times.
Make your seasonings: While cabbage is soaking, combine apple, onion, ginger and garlic in food processor/blender and process until fairly smooth.
In a small bowl, mix the chili pepper with a small amount of water to make a wet paste. You can just as easily blend it with the apple/onion mixture adding a couple tablespoons of water as well.
Mix everything together: Once cabbage is ready, drain water, reserving 1/2 cup, and rinse well. Place cabbage back in large bowl, combine with the scallions, apple/onion mixture and chili paste. Mix well to coat all pieces. Either use your hands (with gloves on pref to protect from the chili pepper) or simply use wooden spoons to toss everything.
Packing: Place the kimchi in glass jars or containers with lid, pack down the best you can to close air pockets and leave about an inch at the top for air and gases. Top with remaining juices, add reserved brine if needed to cover vegetables.
Fermenting: Let kimchi set at room temp (or in a cool place like a pantry or closet if weather is extremely warm) for 24 – 36 hours. After 24 hours, open kimchi and pack the mixture down with a spoon (the cabbage will have likely shrunk and you’ll have more liquids). You may notice it bubbling, this is perfectly normal as the kimchi is fermenting. As your kimchi ferments the flavors will develop, taste every 24 hours and place kimchi in the refrigerator once you’re happy with the taste and to slow fermentation, usually after 48 – 36 hours. It should be tangy, spicy and slightly sweet. After moving to the fridge, it’s best used within a month, maybe two.
Makes about 3 – 4 cups.
Notes:
Practice makes perfect with kimchi. You may find you like it more or less spicy. After a few tries you’ll find the perfect mix to suit your taste. Also, how fermented you like your kimchi will take practice as well. The weather will also play a role in how fast/slow your mixture will ferment. Higher temperatures will progress fermentation while cooler will slow it down.
If you’re in a pinch without an apple in sight, use 2 teaspoons of organic pure cane sugar, coconut sugar or sugar in the raw….just the puriest sugar you can find. You may like to add a bit of water to the mix as well, about 2 – 3 tablespoons.
You can also enjoy kimchi fresh right after you mix it and store it straight in the fridge. You may like to experiment by putting half the recipe in the fridge and the other half in the pantry to ferment & sour to see which flavor is your favorite.
Optional ingredients for color and variation: carrots and/or daikon radish (grated or julienned), about a 1/2 cup of each. If using these, add to cabbage when mixing scallions and wet mixtures together.
If using savoy or green cabbage, quarter cabbage, remove core and roughly slice.
If you don’t have glass jars, plastic containers with lids will work just as well. If you have too much room, more than and inch, place plastic wrap over top but sinking it close to the surface of the kimchi and cover with lid.
Ingredients
1 medium Napa cabbage, about 2 lbs (savoy, green or any combo works too)
1/4 cup kosher, sea salt or other course salt
6 cups water
3/4 sweet apple (I used fuji), chopped
1/2 small white onion, chopped
1 1/2 inch ginger, chopped
1 – 2 cloves garlic
3 tablespoons Korean chili powder (gochugaru) or 1 tablespoon each cayenne & Hungarian paprika
3 – 4 scallions (green onions), sliced 1 inch
Preparing Cabbage: Quarter cabbage and chop laterally into about 2 inch pieces. Place cabbage in a an extra large bowl or pot. Combine salt with 2 cups of luke warm water, stir to dissolve salt. Pour salt water over the cabbage and add remaining 4 cups, stir to mix. If you can, place a plate or circular baking dish of sorts on top to submerge the cabbage (I used a pie dish), place something with a good amount of weight on top to hold down if necessary (it’s not completely necessary but will help to evenly wilt the cabbage). Give cabbage a good mix every now and then. Let set for 2 hours, up to 12 if you like. I found that 2 – 4 hours was enough and didn’t see much change between the two times.
Make your seasonings: While cabbage is soaking, combine apple, onion, ginger and garlic in food processor/blender and process until fairly smooth.
In a small bowl, mix the chili pepper with a small amount of water to make a wet paste. You can just as easily blend it with the apple/onion mixture adding a couple tablespoons of water as well.
Mix everything together: Once cabbage is ready, drain water, reserving 1/2 cup, and rinse well. Place cabbage back in large bowl, combine with the scallions, apple/onion mixture and chili paste. Mix well to coat all pieces. Either use your hands (with gloves on pref to protect from the chili pepper) or simply use wooden spoons to toss everything.
Packing: Place the kimchi in glass jars or containers with lid, pack down the best you can to close air pockets and leave about an inch at the top for air and gases. Top with remaining juices, add reserved brine if needed to cover vegetables.
Fermenting: Let kimchi set at room temp (or in a cool place like a pantry or closet if weather is extremely warm) for 24 – 36 hours. After 24 hours, open kimchi and pack the mixture down with a spoon (the cabbage will have likely shrunk and you’ll have more liquids). You may notice it bubbling, this is perfectly normal as the kimchi is fermenting. As your kimchi ferments the flavors will develop, taste every 24 hours and place kimchi in the refrigerator once you’re happy with the taste and to slow fermentation, usually after 48 – 36 hours. It should be tangy, spicy and slightly sweet. After moving to the fridge, it’s best used within a month, maybe two.
Makes about 3 – 4 cups.
Notes:
Practice makes perfect with kimchi. You may find you like it more or less spicy. After a few tries you’ll find the perfect mix to suit your taste. Also, how fermented you like your kimchi will take practice as well. The weather will also play a role in how fast/slow your mixture will ferment. Higher temperatures will progress fermentation while cooler will slow it down.
If you’re in a pinch without an apple in sight, use 2 teaspoons of organic pure cane sugar, coconut sugar or sugar in the raw….just the puriest sugar you can find. You may like to add a bit of water to the mix as well, about 2 – 3 tablespoons.
You can also enjoy kimchi fresh right after you mix it and store it straight in the fridge. You may like to experiment by putting half the recipe in the fridge and the other half in the pantry to ferment & sour to see which flavor is your favorite.
Optional ingredients for color and variation: carrots and/or daikon radish (grated or julienned), about a 1/2 cup of each. If using these, add to cabbage when mixing scallions and wet mixtures together.
If using savoy or green cabbage, quarter cabbage, remove core and roughly slice.
If you don’t have glass jars, plastic containers with lids will work just as well. If you have too much room, more than and inch, place plastic wrap over top but sinking it close to the surface of the kimchi and cover with lid.
How To Make Easy Kimchi.
An oriental version of sauerkraut!
- Fermented food: everything you need to know for your health - Telegraph
Kimchi is pretty easy to make, although everyone has their own take on it.
...it’s “a flavour bomb”.
It’s certainly pungent, vibrant and an acquired taste.
“Kimchi is packed full of antioxidants and has 1000 times more lactobacillus than yogurt so it’s amazing for your gut and digestion.”
The live bacteria or probiotics contained in fermented foods are certainly great for our digestive tracts – they restore the proper balance of bacteria in gut (diminished from years of gobbling antibiotic drugs and chlorine-laced tap water); are rich in enzymes, vitamins and nutrients; and because they’re already breaking down, ferments are easier to digest and help the digestive system run much more smoothly.
In that respect, eating fermented foods is a bit like having an oil change for your stomach.
Their Russian dish beet kvass with beetroot slices with salt is said to purify the blood and improve liver function; their sauerkraut is pitched as "perfect for brain health and a combatant of depression and anxiety";
- How To Make Easy Kimchi - Recipe | The Kitchn:
Recipe Notes
Salt: Use salt that is free of iodine and anti-caking agents, which can inhibit fermentation.
Water: Chlorinated water can inhibit fermentation, so use spring, distilled, or filtered water if you can.
Seafood flavor and vegetarian alternatives: Seafood gives kimchi an umami flavor.
Different regions and families may use fish sauce, salted shrimp paste, oysters, and other seafood.
Use about 2 tablespoons of fish sauce, salted shrimp paste, or a combination of the two.
For vegetarian kimchi, I like using 3/4 teaspoon kelp powder mixed with 3 tablespoons water, or simply 3 tablespoons of water.
- Kimchi | Vegetable Recipes | Jamie Oliver
Tips: Gochugaru is Korean red pepper powder.
Inside the Spice Cabinet: Gochugaru — Spice Intelligence | The Kitchn
Daikon is a white radish, also called mooli, and can be found at Asian grocers.
- Kimchi Recipe - NYT Cooking
with soy sauce and fish sauce.
"You don’t need stoneware crocks or special jars to make kimchi.
You do need a large bowl and multiple containers.
When you become confident, you can add radishes and turnips, but this is the basic formula, from a book on preserving,
“Tart and Sweet” by Kelly Geary and Jessie Knadler.
The carrots are not strictly traditional, but I particularly like their crunch.
Some people like their kimchi “new,” and some let it get really funky.
Refrigerated and covered, it lasts indefinitely.
I eat it many ways: finely chopped with steamed rice, fried eggs and Japanese sesame salt; stirred into chicken noodle soup; on steak, mixed with fresh watercress.
In Korean food, it’s ketchup, mustard and relish, all in one."
- Homemade Vegan Kimchi Recipe | Serious Eats by J. Kenji López-Alt.
Note: This kimchi will get more and more sour as it ages.
It can be eaten immediately, but is optimal at around 3 weeks.
For a more traditional kimchi, replace the miso paste with 1/4 cup fish sauce or 2 tablespoons jarred brined tiny shrimp.
It's normal for the kimchi to produce lots of gas as it's fermenting.
Your jar's lids may pop open when you open them and bubbles may appear in the liquid.
Do not be alarmed.
- Kimchi Recipe - David Lebovitz
- How to make kimchi in 5 easy steps | MNN - Mother Nature Network
...fish sauce, adds a savory dimension to kimchi.
- Easy Vegan Kimchi | Minimalist Baker Recipes
I did my best to keep this recipe simple, requiring just 10 basic ingredients that you should have easy access to.
- just went with standard red pepper flakes.
- Recipe with Kimchi:20 Ways To Get Your Kimchi Fix | The Huffington Post
- Fermented food: everything you need to know for your health - Telegraph
Kimchi is pretty easy to make, although everyone has their own take on it.
...it’s “a flavour bomb”.
It’s certainly pungent, vibrant and an acquired taste.
“Kimchi is packed full of antioxidants and has 1000 times more lactobacillus than yogurt so it’s amazing for your gut and digestion.”
The live bacteria or probiotics contained in fermented foods are certainly great for our digestive tracts – they restore the proper balance of bacteria in gut (diminished from years of gobbling antibiotic drugs and chlorine-laced tap water); are rich in enzymes, vitamins and nutrients; and because they’re already breaking down, ferments are easier to digest and help the digestive system run much more smoothly.
In that respect, eating fermented foods is a bit like having an oil change for your stomach.
Their Russian dish beet kvass with beetroot slices with salt is said to purify the blood and improve liver function; their sauerkraut is pitched as "perfect for brain health and a combatant of depression and anxiety";
- How To Make Easy Kimchi - Recipe | The Kitchn:
Recipe Notes
Salt: Use salt that is free of iodine and anti-caking agents, which can inhibit fermentation.
Water: Chlorinated water can inhibit fermentation, so use spring, distilled, or filtered water if you can.
Seafood flavor and vegetarian alternatives: Seafood gives kimchi an umami flavor.
Different regions and families may use fish sauce, salted shrimp paste, oysters, and other seafood.
Use about 2 tablespoons of fish sauce, salted shrimp paste, or a combination of the two.
For vegetarian kimchi, I like using 3/4 teaspoon kelp powder mixed with 3 tablespoons water, or simply 3 tablespoons of water.
- Kimchi | Vegetable Recipes | Jamie Oliver
Tips: Gochugaru is Korean red pepper powder.
Inside the Spice Cabinet: Gochugaru — Spice Intelligence | The Kitchn
Daikon is a white radish, also called mooli, and can be found at Asian grocers.
- Kimchi Recipe - NYT Cooking
with soy sauce and fish sauce.
"You don’t need stoneware crocks or special jars to make kimchi.
You do need a large bowl and multiple containers.
When you become confident, you can add radishes and turnips, but this is the basic formula, from a book on preserving,
“Tart and Sweet” by Kelly Geary and Jessie Knadler.
The carrots are not strictly traditional, but I particularly like their crunch.
Some people like their kimchi “new,” and some let it get really funky.
Refrigerated and covered, it lasts indefinitely.
I eat it many ways: finely chopped with steamed rice, fried eggs and Japanese sesame salt; stirred into chicken noodle soup; on steak, mixed with fresh watercress.
In Korean food, it’s ketchup, mustard and relish, all in one."
- Homemade Vegan Kimchi Recipe | Serious Eats by J. Kenji López-Alt.
Note: This kimchi will get more and more sour as it ages.
It can be eaten immediately, but is optimal at around 3 weeks.
For a more traditional kimchi, replace the miso paste with 1/4 cup fish sauce or 2 tablespoons jarred brined tiny shrimp.
It's normal for the kimchi to produce lots of gas as it's fermenting.
Your jar's lids may pop open when you open them and bubbles may appear in the liquid.
Do not be alarmed.
- Kimchi Recipe - David Lebovitz
- How to make kimchi in 5 easy steps | MNN - Mother Nature Network
...fish sauce, adds a savory dimension to kimchi.
- Easy Vegan Kimchi | Minimalist Baker Recipes
I did my best to keep this recipe simple, requiring just 10 basic ingredients that you should have easy access to.
- just went with standard red pepper flakes.
- Recipe with Kimchi:20 Ways To Get Your Kimchi Fix | The Huffington Post
Kimchi.
Cooking in Common: Korea's kimchi addiction catches on in the West - SFGate
Betelnut's Cabbage Kimchi recipe:
Betelnut chef Alex Ong recommends making the kimchi marinade 1 day ahead to allow the flavors to blend.
Ong uses the relatively mild Basque chile pepper (piment d'espelette) because he likes its flavor; if you use substitute cayenne, which is hotter, you will need less.
Start with the suggested amount of cayenne and add more to taste.
Makes about 2 quarts or 2 litres.
Ingredients:
4 pounds/2kg Napa cabbage, in 1-inch/2.54 cm pieces
1/4 cup kosher salt
The marinade:
3/4 cup unseasoned rice vinegar
6 tablespoons Korean hot pepper paste (gochujang), see Note
2 tablespoons finely minced garlic
1 tablespoon coarse Korean red chile powder
1 tablespoon Basque chile pepper (piment d'espelette) or 1/2 teaspoons cayenne pepper (or more to taste)
1 tablespoon grated or finely minced ginger
Instructions:
Toss the cabbage with the salt.
Put salted cabbage in a sieve or colander.
Set it over a bowl, then put a weight on top of the cabbage, such as a plastic bag filled with water.
Let drain at room temperature for 24-48 hours.
Make the marinade, preferably 1 day ahead:
In a bowl, whisk together the rice vinegar and hot pepper paste.
Add the garlic, chile powders and ginger.
Whisk to blend.
Working with a little cabbage at a time, squeeze between your hands to remove excess liquid.
Transfer to a bowl.
Add marinade and toss well to coat all cabbage evenly.
Transfer to an airtight glass container and refrigerate for at least 4 days before serving, keeping tightly covered.
The kimchi will last for up to 3 weeks in the refrigerator.
Asian pear variation:
Peel 1 large Asian pear and cut into 3/4-inch cubes.
Toss with enough marinade to coat evenly, about 2 tablespoons.
Serve immediately, if desired, or refrigerate and serve within 1 day.
Sprinkle with coarse sea salt just before serving.
Note:
Piment d'espelette is Red Chili Pepper Powder from France.
Korean hot pepper paste (gochujang) Just Make It Yourself: Red Hot Chili Paste | DIY Korean Food.
What Can I Do With a Tub of Korean Red Pepper Paste? — Good Questions | The Kitchn.
Due to the nature of this recipe, an accurate analysis is not possible, however recipes containing fermented products such as kimchi will contain a significant amount of sodium.
Those ingredients can be adjusted to taste.
Betelnut's Cabbage Kimchi recipe:
Betelnut chef Alex Ong recommends making the kimchi marinade 1 day ahead to allow the flavors to blend.
Ong uses the relatively mild Basque chile pepper (piment d'espelette) because he likes its flavor; if you use substitute cayenne, which is hotter, you will need less.
Start with the suggested amount of cayenne and add more to taste.
Makes about 2 quarts or 2 litres.
Ingredients:
4 pounds/2kg Napa cabbage, in 1-inch/2.54 cm pieces
1/4 cup kosher salt
The marinade:
3/4 cup unseasoned rice vinegar
6 tablespoons Korean hot pepper paste (gochujang), see Note
2 tablespoons finely minced garlic
1 tablespoon coarse Korean red chile powder
1 tablespoon Basque chile pepper (piment d'espelette) or 1/2 teaspoons cayenne pepper (or more to taste)
1 tablespoon grated or finely minced ginger
Instructions:
Toss the cabbage with the salt.
Put salted cabbage in a sieve or colander.
Set it over a bowl, then put a weight on top of the cabbage, such as a plastic bag filled with water.
Let drain at room temperature for 24-48 hours.
Make the marinade, preferably 1 day ahead:
In a bowl, whisk together the rice vinegar and hot pepper paste.
Add the garlic, chile powders and ginger.
Whisk to blend.
Working with a little cabbage at a time, squeeze between your hands to remove excess liquid.
Transfer to a bowl.
Add marinade and toss well to coat all cabbage evenly.
Transfer to an airtight glass container and refrigerate for at least 4 days before serving, keeping tightly covered.
The kimchi will last for up to 3 weeks in the refrigerator.
Asian pear variation:
Peel 1 large Asian pear and cut into 3/4-inch cubes.
Toss with enough marinade to coat evenly, about 2 tablespoons.
Serve immediately, if desired, or refrigerate and serve within 1 day.
Sprinkle with coarse sea salt just before serving.
Note:
Piment d'espelette is Red Chili Pepper Powder from France.
Korean hot pepper paste (gochujang) Just Make It Yourself: Red Hot Chili Paste | DIY Korean Food.
What Can I Do With a Tub of Korean Red Pepper Paste? — Good Questions | The Kitchn.
Due to the nature of this recipe, an accurate analysis is not possible, however recipes containing fermented products such as kimchi will contain a significant amount of sodium.
Those ingredients can be adjusted to taste.
Friday, 25 November 2016
Lemon Yogurt Cake by Ina Garten.
From Cookbook: "Barefoot Contessa at Home: Everyday Recipes You'll Make Over and Over Again".
Lemon Yogurt Cake Recipe : Ina Garten : Food Network

Ingredients
1 1/2 cups all-purpose flour
2 teaspoons baking powder
1/2 teaspoon kosher salt
1 cup plain whole-milk yogurt
1 + 1/3 cups sugar, divided
3 extra-large eggs
2 teaspoons grated lemon zest (2 lemons)
1/2 teaspoon pure vanilla extract
1/2 cup vegetable oil
1/3 cup freshly squeezed lemon juice
For the glaze:
1 cup confectioners' sugar
2 tablespoons freshly squeezed lemon juice
Note: I didn't make this glaze for my cake.

Preheat the oven to 350F/176C (170C).
Grease an 8 1/2x4 1/4x2 1/2inch loaf pan (22x10x6 cm).
Line the bottom with parchment paper.
Grease and flour the pan.
Sift together the flour, baking powder, and salt into 1 bowl.
In another bowl, whisk together the yogurt, 1 cup sugar, the eggs, lemon zest, and vanilla.
Slowly whisk the dry ingredients into the wet ingredients.
With a rubber spatula, fold the vegetable oil into the batter, making sure it's all incorporated.
Pour the batter into the prepared pan and bake for about 50 minutes (40 min), or until a cake tester placed in the center of the loaf comes out clean.
Meanwhile, cook the 1/3 cup lemon juice and remaining 1/3 cup sugar in a small pan until the sugar dissolves and the mixture is clear.
Set aside.
When the cake is done, allow it to cool in the pan for 10 minutes.
Carefully place on a baking rack over a sheet pan.
While the cake is still warm, pour the lemon-sugar mixture over the cake and allow it to soak in.
Cool.
For the glaze, combine the confectioners' sugar and lemon juice and pour over the cake.
Note: next time I'll try...
- I will bake this cake at 150°C fan for 60 min.
- I will reduce sugar to a total of 220g -1 cup, divided to 170g and 50g)
So Easy and it really is a very soft and moist cake.
Nutritional Information
Calories 384 / Total Fat 16.1g / Saturated Fat 3.7g / Cholesterol 72mg / Sodium 199mg / Potassium 259mg
Lemon Yogurt Cake Recipe : Ina Garten : Food Network
Ingredients
1 1/2 cups all-purpose flour
2 teaspoons baking powder
1/2 teaspoon kosher salt
1 cup plain whole-milk yogurt
1 + 1/3 cups sugar, divided
3 extra-large eggs
2 teaspoons grated lemon zest (2 lemons)
1/2 teaspoon pure vanilla extract
1/2 cup vegetable oil
1/3 cup freshly squeezed lemon juice
For the glaze:
1 cup confectioners' sugar
2 tablespoons freshly squeezed lemon juice
Note: I didn't make this glaze for my cake.
Preheat the oven to 350F/176C (170C).
Grease an 8 1/2x4 1/4x2 1/2inch loaf pan (22x10x6 cm).
Line the bottom with parchment paper.
Grease and flour the pan.
Sift together the flour, baking powder, and salt into 1 bowl.
In another bowl, whisk together the yogurt, 1 cup sugar, the eggs, lemon zest, and vanilla.
Slowly whisk the dry ingredients into the wet ingredients.
With a rubber spatula, fold the vegetable oil into the batter, making sure it's all incorporated.
Pour the batter into the prepared pan and bake for about 50 minutes (40 min), or until a cake tester placed in the center of the loaf comes out clean.
Meanwhile, cook the 1/3 cup lemon juice and remaining 1/3 cup sugar in a small pan until the sugar dissolves and the mixture is clear.
Set aside.
When the cake is done, allow it to cool in the pan for 10 minutes.
Carefully place on a baking rack over a sheet pan.
While the cake is still warm, pour the lemon-sugar mixture over the cake and allow it to soak in.
Cool.
For the glaze, combine the confectioners' sugar and lemon juice and pour over the cake.
Note: next time I'll try...
- I will bake this cake at 150°C fan for 60 min.
- I will reduce sugar to a total of 220g -1 cup, divided to 170g and 50g)
So Easy and it really is a very soft and moist cake.
Nutritional Information
Calories 384 / Total Fat 16.1g / Saturated Fat 3.7g / Cholesterol 72mg / Sodium 199mg / Potassium 259mg
Saturday, 19 November 2016
Five Seed No-Knead Bread. By Kellie Anderson.
Based on South African seed bread, this loaf is chewy and very tasty.
No kneading and one rise make this loaf a great choice for the novice bread maker or those who just want fresh bread quickly.
As you can see from the list of seeds you get a whack of good fats and Vitamin E as well as fibre, but you will like it more for the taste.

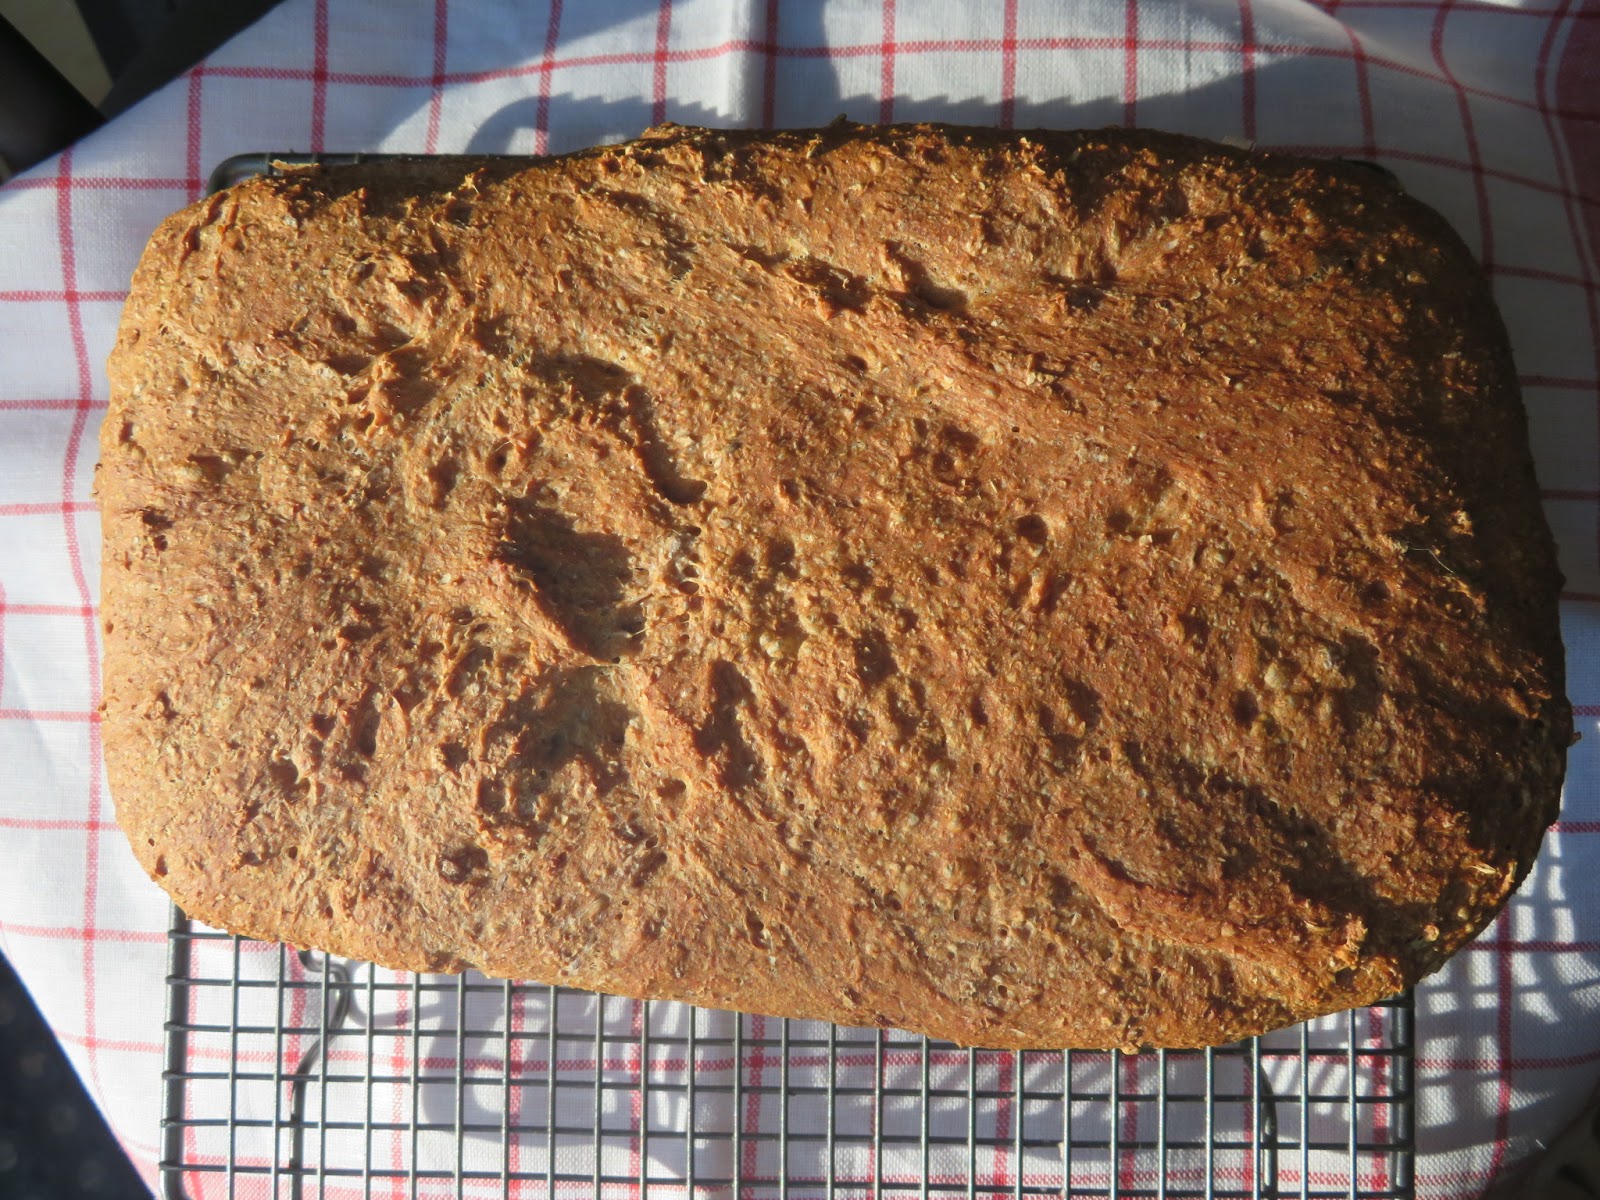
Makes 2 small loaves, about 16 slices each. (I made one!)
600g strong wholemeal flour (or spelt flour, if available)
2 x 7g packets dried (quick) yeast OR 2 tsps of it
1 heaped tsp salt
25 g linseeds
50 g pumpkin seeds
50 g sunflower seeds
25 g poppyseeds
1 tsp caraway or fennel seeds (optional)
1 tbsp honey or barley malt syrup
550ml warm water (hand-hot)

Oil and flour two 900 g (2 lb) bread tins, or one large baking sheet.
Toast the seeds in a dry pan for 3-4 minutes and add to a large wide bowl, together the flour, yeast and salt.
Use a hand to thoroughly mix the dry ingredients.
In a separate jug stir the honey or malt extract into 550 ml of hand-hot water.
Pour the water into the dry ingredients and lightly mix until you have a soft dough and somewhat sloppy dough (vigorous mixing toughens the bread).
I find it easiest to achieve a light dough by making a claw of one hand and mixing, but use a large metal spoon if you like.
Divide the alarmingly-loose dough between the two tins, or form into two rounds on a greased and floured baking sheet – cornmeal is good here.
Cover the dough loosely with either cling film or a clean tea towel.
If you are making rounds, dust the dough with flour and cover with a tea towel.
Leave the dough to rise in a warm, draught-free place until nearly doubled in size – about 40 minutes to one hour.
It may not rise as high as unseeded bread.
Meanwhile heat your oven to 200C.
Bake the bread on the middle shelf for about 35 minutes.
Remove from the tin (usually requires a firm whack on the work surface to loosen) and check that the bottom sounds hollow when tapped.
If not, place back in the oven for a further five or so minutes – without the tin.
Cool completely on a wire rack.
Use one loaf and pop the other into your freezer for later.
The breads keep well for three days and makes terrific toast.
Really lovely bread.
Highly recommended.

Kellie Anderson is an Edinburgh-based food writer, recipe developer, blogger, and also a cancer health educator and nutrition adviser with cancer support charity, Maggie's Cancer Caring Centres.
Her healthy food blog: kelliesfoodtoglow.com.
No kneading and one rise make this loaf a great choice for the novice bread maker or those who just want fresh bread quickly.
As you can see from the list of seeds you get a whack of good fats and Vitamin E as well as fibre, but you will like it more for the taste.
Makes 2 small loaves, about 16 slices each. (I made one!)
600g strong wholemeal flour (or spelt flour, if available)
2 x 7g packets dried (quick) yeast OR 2 tsps of it
1 heaped tsp salt
25 g linseeds
50 g pumpkin seeds
50 g sunflower seeds
25 g poppyseeds
1 tsp caraway or fennel seeds (optional)
1 tbsp honey or barley malt syrup
550ml warm water (hand-hot)
Oil and flour two 900 g (2 lb) bread tins, or one large baking sheet.
Toast the seeds in a dry pan for 3-4 minutes and add to a large wide bowl, together the flour, yeast and salt.
Use a hand to thoroughly mix the dry ingredients.
In a separate jug stir the honey or malt extract into 550 ml of hand-hot water.
Pour the water into the dry ingredients and lightly mix until you have a soft dough and somewhat sloppy dough (vigorous mixing toughens the bread).
I find it easiest to achieve a light dough by making a claw of one hand and mixing, but use a large metal spoon if you like.
Divide the alarmingly-loose dough between the two tins, or form into two rounds on a greased and floured baking sheet – cornmeal is good here.
Cover the dough loosely with either cling film or a clean tea towel.
If you are making rounds, dust the dough with flour and cover with a tea towel.
Leave the dough to rise in a warm, draught-free place until nearly doubled in size – about 40 minutes to one hour.
It may not rise as high as unseeded bread.
Meanwhile heat your oven to 200C.
Bake the bread on the middle shelf for about 35 minutes.
Remove from the tin (usually requires a firm whack on the work surface to loosen) and check that the bottom sounds hollow when tapped.
If not, place back in the oven for a further five or so minutes – without the tin.
Cool completely on a wire rack.
Use one loaf and pop the other into your freezer for later.
The breads keep well for three days and makes terrific toast.
Really lovely bread.
Highly recommended.
Kellie Anderson is an Edinburgh-based food writer, recipe developer, blogger, and also a cancer health educator and nutrition adviser with cancer support charity, Maggie's Cancer Caring Centres.
Her healthy food blog: kelliesfoodtoglow.com.
Thursday, 17 November 2016
Melting meatball macaroni.
Melting meatball macaroni | BBC Good Food
300g pork mince
400g beef mince (with around 10% fat)
½ tsp fennel seeds
½ tsp chilli flakes
2 tsp dried oregano
200g cheese - tallegio or mozzarella, chopped into small chunks
2 tbsp olive oil
1 large onion, finely chopped
4 garlic cloves, crushed
2 tsp tomato purée
50ml red wine
2 x 400g cans chopped tomatoes
500ml passata
3 bay leaves
2 tsp golden caster sugar
400g macaroni or other pasta shape
crusty bread, to serve (optional)
Heat oven to 200C/180C fan/gas 6.
Mix the pork and beef mince with the fennel seeds, chilli, 1 tsp oregano and some seasoning in a large bowl until combined.
Divide and shape into 18 meatballs with cheese (a nugget or two of taleggio) in the middle (save some for the top), then chill for 10 mins.
Heat 1 tbsp oil in a large pan (use a flameproof casserole dish if you can – it’ll save on washing up).
Add the onion and a pinch of salt and sizzle until softened, about 8 mins.
Stir in the garlic and cook for 1 min more, then add the tomato purée, wine, tomatoes, passata, bay leaves, sugar remaining oregano and lots of seasoning, cover with a lid and simmer for 20 mins.
Meanwhile, arrange the meatballs on a baking tray lined with foil, drizzle with the remaining oil and bake for 10 mins.
Cook the pasta in a pan of boiling salted water according to packet instructions, then drain, reserving some water.
If the pan is not ovenproof, tip the sauce into a casserole dish.
Stir the pasta into the sauce along with the liquid from the meatballs and some pasta water if it needs thinning.
Turn the grill to a medium-high setting.
Nestle the meatballs into the pasta, so that they poke out the top.
Scatter the remaining cheese (taleggio) over the top and grill for 5-10 mins until the cheese and meatballs are golden.
Serve with crusty bread, if you like.
OR:
- Herby Veal Meatballs with Parmesan & Pine Nuts in Tomato Sauce | Recipes | Gino's Italian Escape
300g pork mince
400g beef mince (with around 10% fat)
½ tsp fennel seeds
½ tsp chilli flakes
2 tsp dried oregano
200g cheese - tallegio or mozzarella, chopped into small chunks
2 tbsp olive oil
1 large onion, finely chopped
4 garlic cloves, crushed
2 tsp tomato purée
50ml red wine
2 x 400g cans chopped tomatoes
500ml passata
3 bay leaves
2 tsp golden caster sugar
400g macaroni or other pasta shape
crusty bread, to serve (optional)
Heat oven to 200C/180C fan/gas 6.
Mix the pork and beef mince with the fennel seeds, chilli, 1 tsp oregano and some seasoning in a large bowl until combined.
Divide and shape into 18 meatballs with cheese (a nugget or two of taleggio) in the middle (save some for the top), then chill for 10 mins.
Heat 1 tbsp oil in a large pan (use a flameproof casserole dish if you can – it’ll save on washing up).
Add the onion and a pinch of salt and sizzle until softened, about 8 mins.
Stir in the garlic and cook for 1 min more, then add the tomato purée, wine, tomatoes, passata, bay leaves, sugar remaining oregano and lots of seasoning, cover with a lid and simmer for 20 mins.
Meanwhile, arrange the meatballs on a baking tray lined with foil, drizzle with the remaining oil and bake for 10 mins.
Cook the pasta in a pan of boiling salted water according to packet instructions, then drain, reserving some water.
If the pan is not ovenproof, tip the sauce into a casserole dish.
Stir the pasta into the sauce along with the liquid from the meatballs and some pasta water if it needs thinning.
Turn the grill to a medium-high setting.
Nestle the meatballs into the pasta, so that they poke out the top.
Scatter the remaining cheese (taleggio) over the top and grill for 5-10 mins until the cheese and meatballs are golden.
Serve with crusty bread, if you like.
OR:
- Herby Veal Meatballs with Parmesan & Pine Nuts in Tomato Sauce | Recipes | Gino's Italian Escape
Tuesday, 15 November 2016
Donna Hay.
loveFOOD meets Donna Hay:
"Donna's top tips for…
Cooking spaghetti: Make sure the water is boiling and salted, and that there’s plenty of it.
The most important thing is to quickly get your water boiling again after you’ve added the spaghetti (to keep the pasta from sticking together).
The easiest way to do that is to put the lid back on the pan once the pasta is in.
Baking a sponge: Fairy fingers, as we call it back home.
It’s all about keeping the air trapped in the sponge, so you have to have light fingers to whisk those eggs up really light.
And always sift your flour three times.
Cooking vegetables: I put them in ice water after cooking if I’m eating them as part of a sald, just to keep the colour.
If served hot, steam your veg and take them off the heat just before they’re ready, because food is hot and will keep on cooking.
Crackling: Turn the oven up to as high as it will go (250, even), then dry the crackle, salt it (all the usual things) and blast the meat for 10 or 15 minutes, until you see it all bubbled and crackled.
Then turn the oven right down to 120/140 to finish the meat off."
What do you think of British food?
For me, it’s all about Eton mess and pudding!
And on the savoury side, I’d far sooner think of fish and chips, pies, or bangers and mash than curries.
I’m afraid I love my fresh seafood though, so Australia comes first for me.
'via Blog this'
"Donna's top tips for…
Cooking spaghetti: Make sure the water is boiling and salted, and that there’s plenty of it.
The most important thing is to quickly get your water boiling again after you’ve added the spaghetti (to keep the pasta from sticking together).
The easiest way to do that is to put the lid back on the pan once the pasta is in.
Baking a sponge: Fairy fingers, as we call it back home.
It’s all about keeping the air trapped in the sponge, so you have to have light fingers to whisk those eggs up really light.
And always sift your flour three times.
Cooking vegetables: I put them in ice water after cooking if I’m eating them as part of a sald, just to keep the colour.
If served hot, steam your veg and take them off the heat just before they’re ready, because food is hot and will keep on cooking.
Crackling: Turn the oven up to as high as it will go (250, even), then dry the crackle, salt it (all the usual things) and blast the meat for 10 or 15 minutes, until you see it all bubbled and crackled.
Then turn the oven right down to 120/140 to finish the meat off."
What do you think of British food?
For me, it’s all about Eton mess and pudding!
And on the savoury side, I’d far sooner think of fish and chips, pies, or bangers and mash than curries.
I’m afraid I love my fresh seafood though, so Australia comes first for me.
'via Blog this'
Monday, 14 November 2016
Хлеб.
- Традиционный французский хлеб - КУЛИНАРНЫЕ ЭССЕ ДИЛЕТАНТА:
- Хлеб на "бездрожжевой" закваске. - КУЛИНАРНЫЕ ЭССЕ ДИЛЕТАНТА:
'via Blog this'
Если не хотите тесто заводить сразу, то поставьте получившуюся закваску в холодильник (лучше в стекляной банке, накрытой маленькой тарелкой).
Утром выньте, дайте согреться до комнатной температуры и замешивайте ваше тесто.
Заксвавска - результат действия молочной бактерии в мучно-водяной смеси.
Т.е. молочная бактерия превращает сахар, содержащийся в муке в молочную и уксусную кислоту.
Отсюда и запах натуральной закваски - резкий, кислый.
Моя закваска тоже иногда дает на поверхности слой черной воды.
Я уже замешивала тесто с такой закваской, слив предварительно этот черный осадок.
Но такая закваска, как мне кажеться, становится менее сильной.
Лучше всего, в таком случае поставить новую закваску.
Скорость "скисания" воды и муки зависит, скорее всего, от качества воды (поэтому и рекомендуется брать родниковую или отстояную воду РН которой не более 6,5) качества муки (количество содержащихся в ней сахаров) и температурного режима.
Замечу, что сама я использую родниковую воду, продающуюся в бутылках, смотрю всегда, чтобы показатель кислотности РН не превышал 6 -6,5. Как для детей грудничков.
Поставив смесь воды и муки на закваску, не стоит ее мешеть слишком часто.
Из собственного опыта, достаточно перемешать закваску один раз в день. Банку предохранять от сквозняков, прикрыв, не завинчивая, крышкой.
Храню закваску в холодильнике, подкармливая 1 раз в неделю.
В некоторых источниках рекомендуется подкармливать чаще.
Но все равно иногда приходится ее заводить заново.
Хлеб я пеку сейчас нерегулярно, вот и забываю ее подпитывать. Она и умирает.
Закваску можно также высушить или заморозить, так она храниться несколько месяцев.
Если за три дня закваска не созрела (что по вснй видимости и произошло), дайте ей постоять еще пару дней.
Здесь много факторов имеют значение.
Может быть микрофлоре вашей закваски не понравился температурный режим, может быть - сквозняки.
Хлеб на такой закваске подходит немного дольше, чем на дрожжях.
Миску с готовым тестом ставте в теплое место без сквозняков (25-26 С°), накройте влажным х/б или льняным полотенцем.
Пусть подходит, пока не увеличится вдвое в объеме.
На это может уйти больше времени, чем указано выше в моем описании рецепта.
Ничего страшного.
Ничего страшного, если тесто немного липнет к рукам после подхода.
Обминание и втоорой подход теста необходим, чтобы в итоге пористость готового хлеба была как можно более равномерной.
В последнее время после первого подхода я обминаю тесто (прямо в миске приминаю его со всехсторон, "разбивая" т.о. крупные пузыри газа) и немного спустя ( 30 мин приблизительно) формирую хлеб, выкладываю его на противень и даю подойти (также в теплом месте, без сквозняков), пока не увеличится в объеме в 1,5 - 2 раза.
Выпекаю, как и сказано выше при высокой температуре, которую снижаю через некоторое время.
При недостаточно высокой температуре хлеб не пропечется, даже если Вы его оставите в духовке полтора часа.
Батоны таки получаются только в духовке и на противне.
Тесто разминаю в овал и складываю длинные стороны его к центру одну на другую, приминю с силой ладонью.
Непосредственно перед помещением протвиня с батонами в хорошо разогретую духовку опрыскиваю их водой из спрэя.
Да, не забудте поставить чашку с водой на дно духовки.
'via Blog this'
- Хлеб на "бездрожжевой" закваске. - КУЛИНАРНЫЕ ЭССЕ ДИЛЕТАНТА:
'via Blog this'
Если не хотите тесто заводить сразу, то поставьте получившуюся закваску в холодильник (лучше в стекляной банке, накрытой маленькой тарелкой).
Утром выньте, дайте согреться до комнатной температуры и замешивайте ваше тесто.
Заксвавска - результат действия молочной бактерии в мучно-водяной смеси.
Т.е. молочная бактерия превращает сахар, содержащийся в муке в молочную и уксусную кислоту.
Отсюда и запах натуральной закваски - резкий, кислый.
Моя закваска тоже иногда дает на поверхности слой черной воды.
Я уже замешивала тесто с такой закваской, слив предварительно этот черный осадок.
Но такая закваска, как мне кажеться, становится менее сильной.
Лучше всего, в таком случае поставить новую закваску.
Скорость "скисания" воды и муки зависит, скорее всего, от качества воды (поэтому и рекомендуется брать родниковую или отстояную воду РН которой не более 6,5) качества муки (количество содержащихся в ней сахаров) и температурного режима.
Замечу, что сама я использую родниковую воду, продающуюся в бутылках, смотрю всегда, чтобы показатель кислотности РН не превышал 6 -6,5. Как для детей грудничков.
Поставив смесь воды и муки на закваску, не стоит ее мешеть слишком часто.
Из собственного опыта, достаточно перемешать закваску один раз в день. Банку предохранять от сквозняков, прикрыв, не завинчивая, крышкой.
Храню закваску в холодильнике, подкармливая 1 раз в неделю.
В некоторых источниках рекомендуется подкармливать чаще.
Но все равно иногда приходится ее заводить заново.
Хлеб я пеку сейчас нерегулярно, вот и забываю ее подпитывать. Она и умирает.
Закваску можно также высушить или заморозить, так она храниться несколько месяцев.
Если за три дня закваска не созрела (что по вснй видимости и произошло), дайте ей постоять еще пару дней.
Здесь много факторов имеют значение.
Может быть микрофлоре вашей закваски не понравился температурный режим, может быть - сквозняки.
Хлеб на такой закваске подходит немного дольше, чем на дрожжях.
Миску с готовым тестом ставте в теплое место без сквозняков (25-26 С°), накройте влажным х/б или льняным полотенцем.
Пусть подходит, пока не увеличится вдвое в объеме.
На это может уйти больше времени, чем указано выше в моем описании рецепта.
Ничего страшного.
Ничего страшного, если тесто немного липнет к рукам после подхода.
Обминание и втоорой подход теста необходим, чтобы в итоге пористость готового хлеба была как можно более равномерной.
В последнее время после первого подхода я обминаю тесто (прямо в миске приминаю его со всехсторон, "разбивая" т.о. крупные пузыри газа) и немного спустя ( 30 мин приблизительно) формирую хлеб, выкладываю его на противень и даю подойти (также в теплом месте, без сквозняков), пока не увеличится в объеме в 1,5 - 2 раза.
Выпекаю, как и сказано выше при высокой температуре, которую снижаю через некоторое время.
При недостаточно высокой температуре хлеб не пропечется, даже если Вы его оставите в духовке полтора часа.
Батоны таки получаются только в духовке и на противне.
Тесто разминаю в овал и складываю длинные стороны его к центру одну на другую, приминю с силой ладонью.
Непосредственно перед помещением протвиня с батонами в хорошо разогретую духовку опрыскиваю их водой из спрэя.
Да, не забудте поставить чашку с водой на дно духовки.
'via Blog this'
Subscribe to:
Posts (Atom)