Wednesday, 31 August 2016
Courgette recipes.
My: Spaghetti squash — or vegetable spaghetti, Courgette Geode, Yellow courgettes.
The 10 best courgette recipes | Life and style | The Guardian
Pickled courgettes
Pickling small courgettes is a great way of preserving a summer glut.
Eat as you would a pickled gherkin.
Makes 2-3 jars
450g small courgettes, sliced lengthways
1 tsp salt, plus extra for sprinkling
1 tsp turmeric
2 tsp mustard seeds
2 tbsp clear honey
300ml cider vinegar
2 onions, sliced into thin rings
1 Sprinkle the courgettes with salt and leave for 1 hour.
2 Mix the turmeric, salt, mustard seeds, honey and vinegar in a pan, bring to the boil and simmer for five minutes. Leave to cool, skimming the surface if necessary.
3 Drain the courgettes, wash well and pat dry. Pack into warmed, clean jars with the onion rings. Cover with the spiced vinegar. Seal well and store for 2-3 days before eating.
Recipe adapted from The Perfect Pickle Book by David Mabley and David Collison (Grub Street)
Courgette praline cake
Moist and dense with a hint of cinnamon, this courgette cake with maple icing and salted almonds is an indulgent way to use up a courgette garden-glut.
Serves 10-12
3 eggs
240ml vegetable oil
300g courgette, grated
400g granulated sugar
2 tsp vanilla extract
400g plain flour
1 tsp bicarbonate of soda
¼ tsp baking powder
1 tsp salt
1 tbsp cinnamon
For the icing
240g light brown sugar
225g butter
60ml whole milk
1 tsp maple flavouring/ maple syrup
220g icing sugar, sifted before measuring
70g salted almonds or pecans, coarsely chopped
1 Preheat the oven to 160C/140C fan/325F/gas mark 3. In a medium bowl, stir together the eggs, oil, courgette, sugar and vanilla extract until well blended.
2 In a separate bowl, combine the flour, bicarbonate of soda, baking powder, salt and cinnamon. Add the dry ingredients to the courgette mixture and stir until just combined.
3 Divide the batter evenly into three 23cm cake tins (well greased or nonstick). If you don't have three pans, bake the cake in batches. Bake until the cake is light brown and set in the middle, or for 22-25 minutes. Turn the cakes out on to a rack to cool.
4 In a medium saucepan, combine the brown sugar and butter. Cook on a medium heat, stirring constantly, until the butter melts and the sugar has dissolved – about 2-3 minutes.
5 Pour in the milk. Continue to stir and bring to a boil. Remove the pan from heat and stir in the maple flavouring. Set aside to cool slightly.
6 Place the icing sugar in a large bowl. Pour the butter mixture over the icing sugar and mix with a spoon for 2-3 minutes until the icing is smooth. Use the icing while it is still warm.
7 Place one layer of the cake on a plate and pour icing in the centre. Spread the icing out to the edges, then set the next cake on top. Repeat. Set the third cake on top and pour the remaining glaze over the cake.
8 Spread the icing to the edges and let it naturally drip down the sides or use a palette knife or spatula to frost the sides if you wish. Sprinkle the top with the almonds.
9 Let the frosting set for at least 30 minutes before cutting. This cake will store well for a few days at room temperature, wrapped tightly.
Recipe supplied by Mary Miller, apassionateplate.com
Saturday, 27 August 2016
Tagliatelle with cavolo nero.
Tagliatelle with cavolo nero | Recipes | Lifestyle | The Independent
Serves 4
1 bunch of cavolo nero
A good pinch of sea salt
40g/11/2oz unsalted butter
2 tbsp grassy flavoured extra-virgin olive oil
3 good-quality anchovies, such as Ortiz
3 cloves of garlic
75g/3oz grated Parmesan
Rinse the cabbage well to remove any dirt. Strip the dark fibrous leaves from their stalks and discard the stalks.
Boil a large pot of well-salted water, plunge in the leaves and cook for five minutes.
Remove and drain.
Separate the cooked cabbage in half.
Place one half in a bowl and the other in a food processor along with the butter, oil, anchovies, garlic and Parmesan and purée until smooth.
Remove and spoon into the bowl, stirring well through the cooked cabbage.
Serve with tagliatelle.
- Cavolo nero pasta recipe - Telegraph
SERVES
4–6
INGREDIENTS
500g/1lb 2oz dried penne
2 garlic cloves, peeled
300g/11oz cavolo nero, leaves stripped off stem
3 tbsp pine nuts, lightly toasted
150ml/5 floz extra virgin olive oil
3 handfuls of grated Parmesan, plus a little extra to serve
METHOD
Bring a pan of salted water to the boil and cook the pasta according to the packet instructions.
Meanwhile, in another large pan, bring some salted water to the boil with the garlic cloves.
When it's boiling, add the cavolo leaves and cook for 5–10 minutes until tender.
Drain, reserving the garlic.
Transfer the cavolo, garlic and pine nuts to a blender or food processor and blitz to a fine purée.
Add the olive oil and Parmesan, then blitz again and season to taste.
You should have a glossy and rich dark green sauce.
Drain the pasta, reserving a cup of the cooking water.
Toss the sauce through the pasta, loosening it with a little cooking water so the sauce clings to the pasta.
Finish with another drizzle of olive oil and a dusting of Parmesan.
- Recipe of the Week: Pappardelle With Cavolo Nero
Wednesday, 17 August 2016
Tuesday, 16 August 2016
Chicken with peppers.
Alla Romana | rachel eats:
Pollo alla Romana / Chicken Roman Style.
Serves 4
1.5 kg chicken, jointed into 8, or 8 thighs
60g pancetta or bacon
Extra virgin olive oil
1 garlic clove
A sprig of rosemary, finely chopped (optional)
Salt and black pepper
150ml dry white wine
800g ripe, fleshy tomatoes, peeled and chopped
4 large or 6 small red or yellow peppers
1 Joint the chicken, making sure the pieces are at room temperature and dry.
Cut the pancetta into short batons.
In a large deep frying pan or heavy casserole, warm 2 tbsp olive oil, then fry the pancetta until the fat has rendered.
Working in batches, if necessary, add the chicken pieces skin-side down and cook until a light golden crust has formed – about 8 minutes – then turn and brown the other side.
2 Assess how much fat is in your pan, adding more olive oil or pouring fat away.
Peel and gently crush the clove of garlic and add to the pan along with the chopped rosemary, if using.
Season with salt and pepper.
3 Add the wine and let it bubble away for a minute or two, then add the tomatoes.
Cover the pan for 10 minutes, lifting the lid to stir halfway through.
Then half-cover and cook over a medium-low heat for 45-60 minutes or until the tomatoes have reduced to a rich sauce and the chicken is tender.
If the sauce looks dry, add a little water.
4 Meanwhile, prepare the peppers by roasting them whole at 200C/400F/gas mark 6 until they are charred and floppy.
Tip them into a bowl and cover with clingfilm for 10 minutes, by which time the skin should pull away.
Discard the skins and pips, then rip the pepper into thick strips.
5 In the last 10 minutes of cooking time, add the peppers to the pan so the flavours can mingle.
Allow the dish to sit for at least an hour – overnight even. Eat room temperature or re-heat gently.
Monday, 15 August 2016
Roasted Butternut Squash Lasagna.
Roasted Butternut Squash Lasagna : Bay Area Bites:
Roasted Butternut Lasagna
Ingredients:
For the meat sauce:
2 thick slices applewood-smoked bacon, finely diced
1 yellow onion, finely diced
2 carrots, peeled and finely diced
1 lb ground pork shoulder
1 lb ground beef
1/2 cup milk
1 28oz + 1 14 oz can crushed tomatoes (6 in 1)
About 10 cremini mushrooms, chopped
2 cups red wine
Kosher salt and freshly ground black pepper
2 teaspoons dried oregano
For the roasted butternut:
1 medium butternut squash, peeled, seeded, and cut into 1/2-inch thick slices
1 teaspoon ground coriander
1/2 teaspoon red pepper flakes
Olive oil
Kosher salt and freshly ground black pepper
1/2 cup finely shredded Parmesan, plus more for sprinkling on top
1 cup crème fraiche
1 lb fresh mozzarella, thinly sliced
6 sheets no-boil lasagna noodles
Preparation:
1. To make the meat sauce, in a large Dutch oven, sauté the bacon over medium heat until crisp.
Remove with a slotted spoon to paper towels.
Add the onion, and sauté over medium-high heat until they start to brown, about 5 minutes.
Add the carrot and sauté just until tender.
Add the pork and beef, reduce the heat to low and sauté the meat just until it loses it’s pink color.
Season with plenty of salt and pepper, then stir in the milk.
Simmer gently until most of the milk is absorbed, about 15 minutes.
Add the tomatoes, mushrooms, red wine, and oregano.
Partially cover the pot and simmer over very low heat for about 1 1/2 to 2 hours or until thickened and delicious.
2. Meanwhile, roast the squash.
Preheat the oven to 400F/204C.
On a rimmed baking sheet, toss the butternut with the coriander, pepper flakes, a drizzle of olive oil, and salt and pepper to taste.
Roast the squash, turning occasionally, until tender and browned, about 40 minutes.
Chop the butternut squash into bite-sized pieces. (You might want to make double the recipe of the butternut squash, this is SO amazingly good.)
3. To put the lasagna together, decrease the oven temperature to 190C.
In a small bowl stir together the Parmesan and crème fraiche.
Lightly oil a square baking pan (about 10x10x3 inches).
Spread a big spoonful of meat sauce over the bottom of the pan.
Put a layer of lasagna noodles (2),
then a layer of meat sauce,
half of the butternut squash,
1/3 of the crème fraiche,
1/3 of the mozzarella,
a thin layer of meat sauce, and then another layer of lasagna noodles.
Repeat:
a layer of meat sauce,
the remaining butternut squash,
1/2 of the remaining crème fraiche,
1/2 of the remaining mozzarella,
a thin layer of meat sauce, and then a final layer of lasagna noodles.
Top with a thin layer of meat sauce, the remaining crème fraiche, and the remaining mozzarella.
Sprinkle with extra Parmesan and put in the oven.
4. Bake until bubbly and the pasta is tender, about 45 minutes.
If the cheese starts to brown too quickly, cover with foil.
If the lasagna bubbles over, put a baking sheet underneath.
Let the lasagna sit for at least 10 minutes before serving.
Dig in!
'via Blog this'
Sunday, 14 August 2016
Tuesday, 9 August 2016
Pressure cooker.
- pressure cooker | Serious Eats
- 5 Reasons Why a Pressure Cooker May Be Better Than a Slow Cooker | The Kitchn
- Instant Pot Lux60 6-in-1 Programmable Electric Pressure Cooker with Stainless Steel Cooking Pot, 6 Litre: Amazon.co.uk: Kitchen & Home
- 5 Excellent Pressure Cooking Resources | The Kitchn
- Electric Pressure Cooker, Smart Cooker, Multi Cooker, 快煲电压力锅
Sunday, 7 August 2016
Make Your Own Magnetic Spice Rack.
Make Your Own Magnetic Spice Rack | Garden Betty
We had dead space on the side of our upper cabinet, but instead of building a bulky shelf, we made a magnetic spice rack to hold our 30 (and counting!) spices.
What you’ll need:
22-guage/0.8 MM steel, cut to size with holes pre-drilled - use 304 or 400 series stainless, which is magnetic (most common types of stainless steel are not).
Spice containers (IKEA Grundtal Magnetic Stainless Steel Containers/Spice Tins, 3 Pack)
Rare earth magnets - 25mm dia x 5mm thick Y10 Ferrite Magnet with Adhesive Foam Pad - 0.45kg Pull | first4magnets.com
(12.7mm x 1.5875 mm OR 25mm dia x 5mm thick Y10 Ferrite Magnet with Adhesive Foam Pad - 0.6kg Pull)
Epoxy (or other industrial-strength glue)- E6000 Industrial Strength Glue Adhesive (0.18 fl oz): Amazon.co.uk: Kitchen & HomeLabels
OR Gorilla Epoxy Glue 25ml from BQ.
SO...We bought these 4-ounce/114ml tin containers in bulk.
They’re lightweight, food grade, and feature clear lids so you can easily see your spices.
Then we screwed the steel plate onto the side of our cabinet, and arranged all our spices to fit.
Upside Down Orange and Blueberry Polenta Cake.
Upside Down Orange and Blueberry Polenta Cake | Many Kitchens:
Upside Down Orange and Blueberry Polenta Cake
Serves 6-8 people
Ingredients and Supplies:
Parchment paper
1 1/3 cup of sugar
3 cups of blueberries
2 large eggs
The zest of 1 large orange (I just substituted a Honeybell wherever the recipe calls for an orange)
2/3 cup of freshly squeezed orange
2/3 cup of olive oil (not extra virgin)
1/2 cup of polenta
1 1/4 cup of all purpose white flour
2 teaspoons of baking powder
1/4 teaspoon of salt
Directions:
1. Heat the oven to 350F/176C.
2. Grease and line the pan (I use an 8 x 8 inch pan) with the parchment paper hanging over the edges.
3. Sprinkle 1/3 cup of sugar over the base then cover with the blueberries.
4. In a large bowl, mix the eggs with 1 cup of sugar and the orange zest.
5. Whisk until mixed then add the orange juice and olive oil and continue mixing.
6. Add polenta, flour, baking powder and salt and mix until smooth.
7. Pour over the blueberries and bake in oven for approximately 45 minutes (insert a skewer and test - skewer should come out clean when cake is done).
8. It should be a nice golden brown on top and still springy to the touch.
9. Let cool for about 10 minutes and then invert over a plate and remove the pan and gently peel off the parchment paper.
'via Blog this'
Friday, 5 August 2016
Monday, 1 August 2016
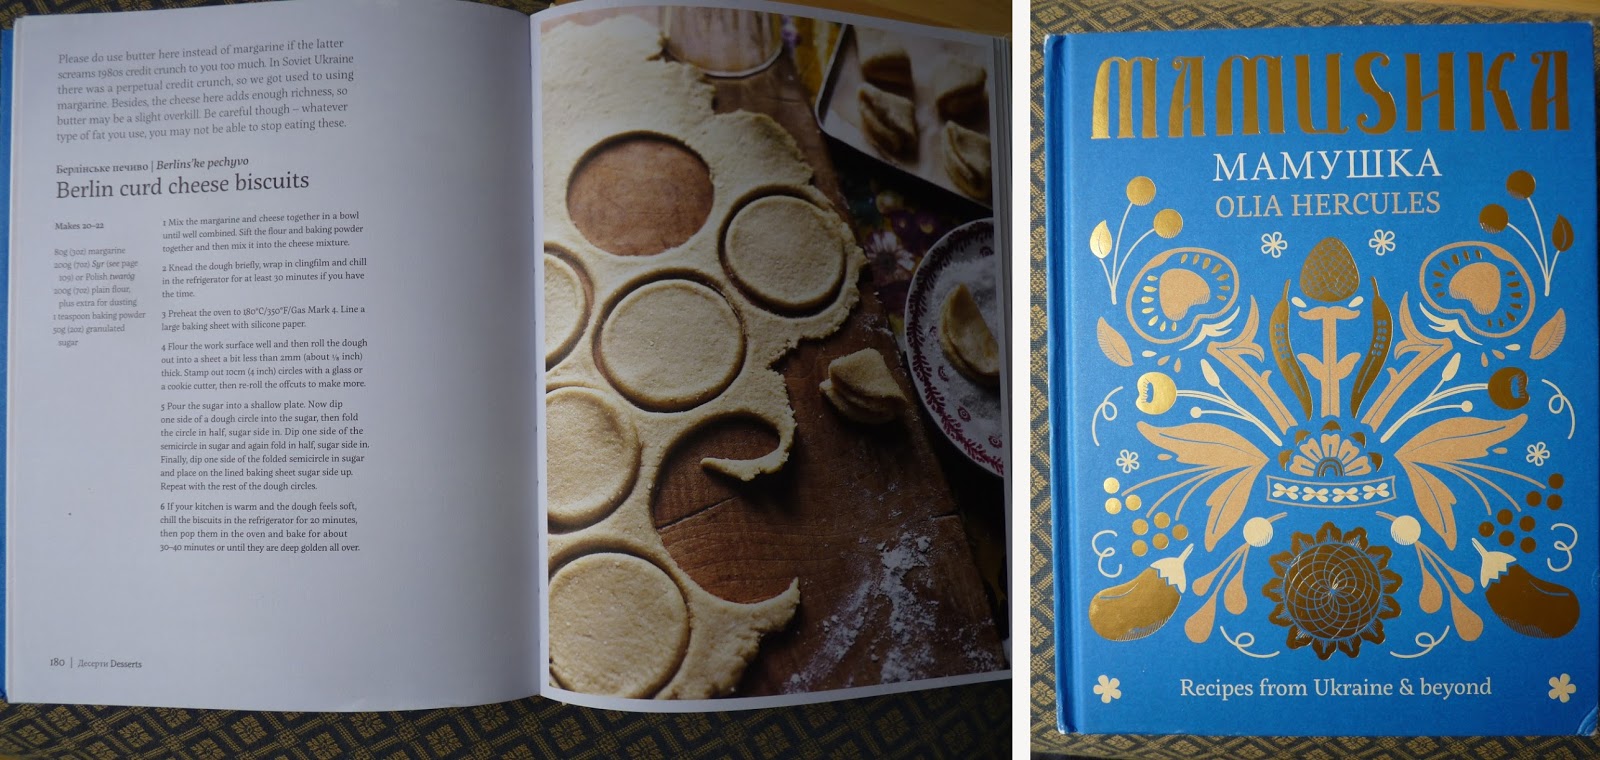
Berlin Curd Cheese Cookies (Berlins’ke Pechyvo).
Berlin Curd Cheese Cookies (Berlins’ke Pechyvo) - The Washington Post
Serve these soft, rich bites with tea.
You’ll need a 10cm/4-inch round cookie cutter (or a glass that’s as wide).
Make Ahead: The dough needs to be refrigerated for at least 30 minutes and up to 1 day.
The cookies can be frozen for up to 3 months.
ingredients
About 5 1/3 tablespoons (1/3 cup) unsalted butter, at room temperature
1 cup low-fat small-curd cottage cheese (Quark from Tesco)
1 1/4 cups flour, plus more for the work surface
1 teaspoon baking powder
1/4 cup sugar
Combine the butter and cottage cheese in the bowl of a stand mixer or handheld electric mixer; beat on low speed until well incorporated.
Stop to scrape down the bowl.
Whisk together the flour and baking powder in a separate bowl, then add to the butter mixture; beat on low speed to form a dough.
Generously flour a work surface; turn out the dough there, then knead for a few minutes, until the dough is less sticky.
Shape it into a disk, wrap in plastic wrap and refrigerate for at least 30 minutes (and up to 1 day).
Line 2 baking sheets with parchment paper or silicone liners.
Roll out the dough to a thickness of 1/2 inch/1cm (about 14 inches/35cm across).
Flour the cutter each time you use it; you should create a total of 20 to 22 rounds of dough; reroll scraps as needed.
Pour the sugar into a wide, shallow bowl.
Dip one side of each round of cookie dough into the sugar, then fold into a half-moon so the sugared side becomes the interior.
Dip one side of each half-moon into the sugar; fold again so the sugar is on the outside.
Each cookie should look like a folded quarter-pie slice; place on the baking sheets at least 1/2 inch/1cm apart.
At this point, if the dough feels soft, place the baking sheets in the refrigerator for 15 to 20 minutes.
When ready to bake, preheat the oven to 350 degrees/175C, keeping the shaped cookies chilled.
Bake (middle rack) one sheet at a time for 30 to 40 minutes or until the cookies are lightly golden all over, turning the sheet from front to back halfway through. Transfer the cookies to a wire rack to cool completely. Repeat to bake the remaining cookies.
from “Mamushka: A Cookbook,” by Olia Hercules
Subscribe to:
Posts (Atom)